You've got a card full of footage, a half-formed idea of the final video, and a deadline that's closer than it looked yesterday. Some clips are from a phone, some from a camera, audio lives on a separate recorder, and one take you need most has bad framing. That's a normal editing day, not a failure.
A good video editing workflow doesn't exist to make editing feel rigid. It exists to stop preventable problems from stealing your creative energy. The clean, ideal workflow matters, but most creators don't work in ideal conditions. They work with missing coverage, rushed approvals, mixed formats, and clients or teammates who say things like “make it pop” without saying what they mean.
That's why the best workflow is the one that survives real-world mess. It keeps your files stable, your story clear, and your revision process under control even when the footage isn't perfect.
Table of Contents
- Plan and Organize Before You Edit
- Assembling Your Story Skeleton
- Refining the Cut and Adding Polish
- Editing Strategies for Imperfect Footage
- Exporting and Managing Client Feedback
- Conclusion From Process to Practice
Plan and Organize Before You Edit
A strong video editing workflow starts before the first cut. Not because rules matter more than creativity, but because confusion compounds fast. If your media is scattered, your bins are vague, and your project file lives on your desktop with names like FINAL_v2_REAL, every later decision gets slower.
Build a system that survives pressure
The best project structure is boring on purpose. It should answer simple questions quickly. Where is the camera original. Where are the audio files. Which export was approved. Which project file is the latest safe version. If your setup can answer those questions in seconds, you'll edit faster and panic less.
Start with one master project folder and keep it consistent across every job. A simple structure works:
| Folder Name | Contents |
|---|---|
| 01_Footage | Camera originals, phone clips, screen recordings |
| 02_Audio | Lav, boom, recorder files, music, voiceover |
| 03_Project_Files | Premiere Pro, Final Cut Pro, DaVinci Resolve files |
| 04_Graphics | Logos, lower-thirds, PSDs, thumbnails, overlays |
| 05_Exports | Review cuts, client versions, platform deliverables |
| 06_Assets | Stock footage, sound effects, licensed music |
| 07_Proxies | Transcoded editing files |
| 08_Documents | Scripts, shot lists, edit notes, approvals |
That structure isn't magic. The value is consistency. When every project follows the same logic, you stop hunting for things and start editing.
Practical rule: If a file matters, it should live where another editor could find it without asking you.
File naming matters for the same reason. Use names that describe source, date, camera, and take when relevant. “A_CAM_Interview_Take03” is useful. “Clip_4839” isn't. If you collaborate with a team handling publishing and approvals, a stable handoff matters just as much as a good cut. A separate process for YouTube video management workflows keeps editing from bleeding into upload chaos.
Use a folder structure that answers questions fast
Most workflow problems don't start in the timeline. They start during ingest.
Bring footage in once, verify it, and leave the originals alone. Don't cut straight off a memory card. Don't scatter phone clips between Downloads and Desktop. Don't mix exported review files with source media. Every one of those shortcuts creates relink headaches later.
A practical ingest routine looks like this:
- Copy first: Move all media into the project folder before opening your NLE.
- Separate source types: Keep footage, audio, graphics, and documents apart.
- Create a fresh project file: Save it into the project-files folder immediately.
- Duplicate project versions: Save dated or clearly versioned backups as you go.
- Keep exports isolated: Review cuts and final deliverables should never sit beside raw footage.
One more habit saves real pain. Back up your project file during major edit milestones. After assembly. After fine cut. After picture lock. If a timeline breaks, a plugin misbehaves, or you need to roll back a creative choice, those checkpoints protect your time.
Treat proxies as a workflow decision, not a last resort
Creators often wait until playback gets ugly before thinking about proxies. That's backward. If you're cutting 4K multi-cam footage, or footage from phones and consumer cameras that may use variable frame rate, proxies are part of setup.
For 4K multi-cam projects, professionals transcode variable frame rate footage into editing-friendly formats such as ProRes 422 before ingestion. Editing native VFR footage can cause audio drift and playback stutter, leading to a 25% drop in editing efficiency according to Pixflow's workflow guidance.
That's the technical side. The practical side is simpler. When playback stutters, you stop judging pacing correctly. When sync drifts, you stop trusting your timeline. Both are creative problems disguised as technical ones.
Use proxies when:
- Footage is high resolution: 4K and above gets heavy fast, especially in multi-cam edits.
- Source clips come from phones: Mobile footage often introduces variable frame rate issues.
- Your timeline mixes formats: Different codecs and frame behaviors create unstable playback.
- You need speed over raw image fidelity: Editing decisions don't require full-res playback every second.
Clean organization doesn't make you less creative. It removes friction so creative judgment can happen earlier and with less guesswork.
Assembling Your Story Skeleton
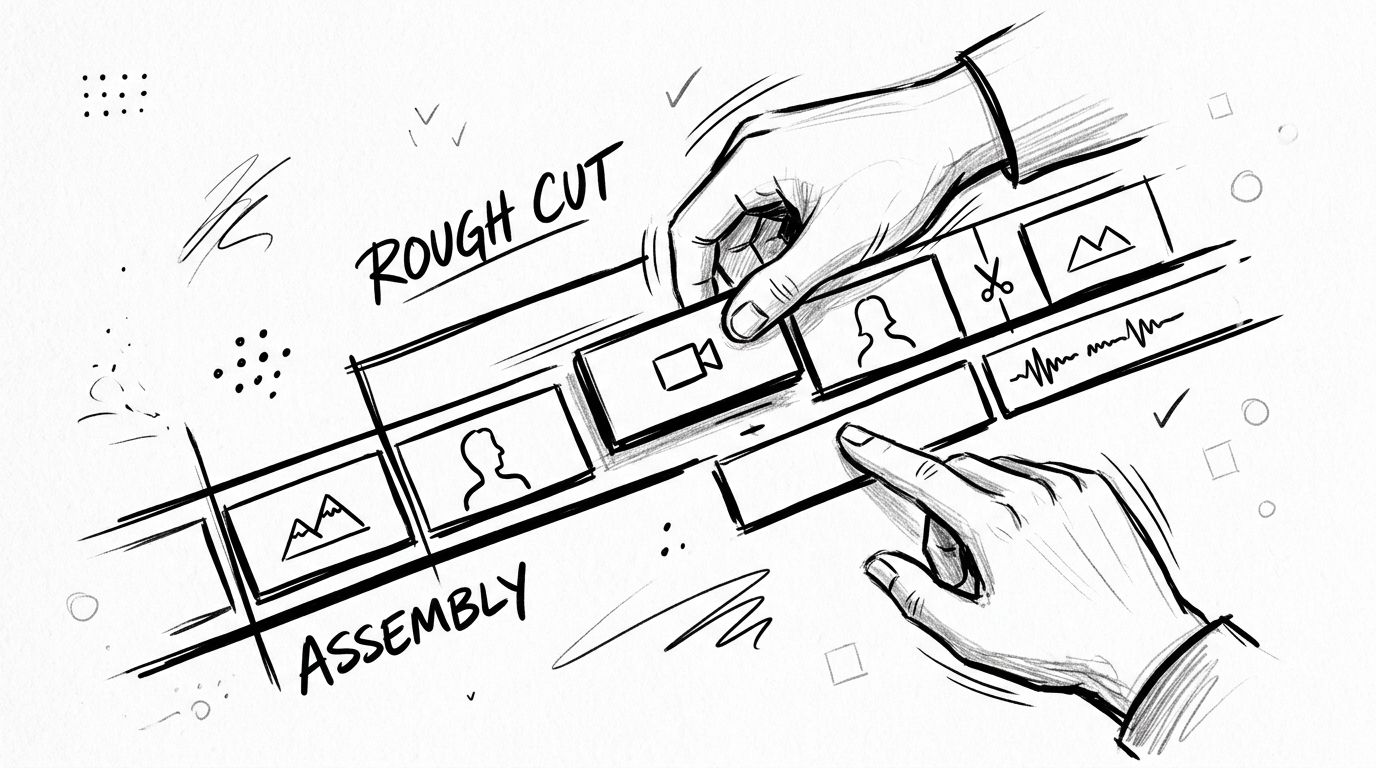
A rough cut should feel a little ugly. That's healthy. If you're trying to make it elegant too early, you're probably avoiding the harder question, which is whether the story works.
Find the spine before you chase polish
Think like a sculptor roughing out shape, not a finisher polishing marble. In this stage, the timeline needs a backbone. For an interview, that backbone is the best answers in the best order. For a tutorial, it's the cleanest path from problem to solution. For a vlog, it's the emotional sequence that makes the day feel like a story instead of a diary.
Start with the material that carries meaning. Usually that's A-roll and primary dialogue. Pull selects fast. Don't stop to clean every breath, fix every jump cut, or audition music for an hour. You're not building the final experience yet. You're testing whether the material can hold attention in the right order.
A useful first-pass mindset:
- Choose clarity over completeness: Keep what moves the point forward. Cut the rest.
- Leave micro-fixes for later: A slightly messy cut with strong structure beats a polished cut with no shape.
- Mark problems instead of solving all of them live: Drop markers for weak transitions, pickup lines, or missing visuals.
- Watch for repetition: If two clips say the same thing, keep the stronger one.
Cut for meaning first
The rough cut is where pacing begins, but not in the final sense. It's where you learn which moments deserve space and which ones drag. Good editors don't ask only “does this sound okay.” They ask “does this earn its place.”
If you're syncing multiple cameras and separate audio, get that done early and check it once carefully. A stable sync map saves you from second-guessing every cut later. Then build broad story sections before tightening internals. Opening. Setup. Development. Payoff. CTA, if the video needs one.
If the assembly doesn't work in plain form, effects won't rescue it. They'll just decorate the problem.
One of the fastest ways to improve this phase is to stop performing precision too soon. A rough cut can contain awkward gaps, placeholder B-roll notes, and temporary music. It only needs to be watchable enough to judge structure. Once that skeleton holds, refinement becomes purposeful instead of reactive.
Refining the Cut and Adding Polish
A lot of edits go off the rails here. The story is mostly working, so the temptation is to start color, add motion graphics, clean every breath, and make it feel finished. Then a client asks to remove a section, tighten the opening, or swap the main quote, and half that work has to be redone.
Shape rhythm with picture and sound
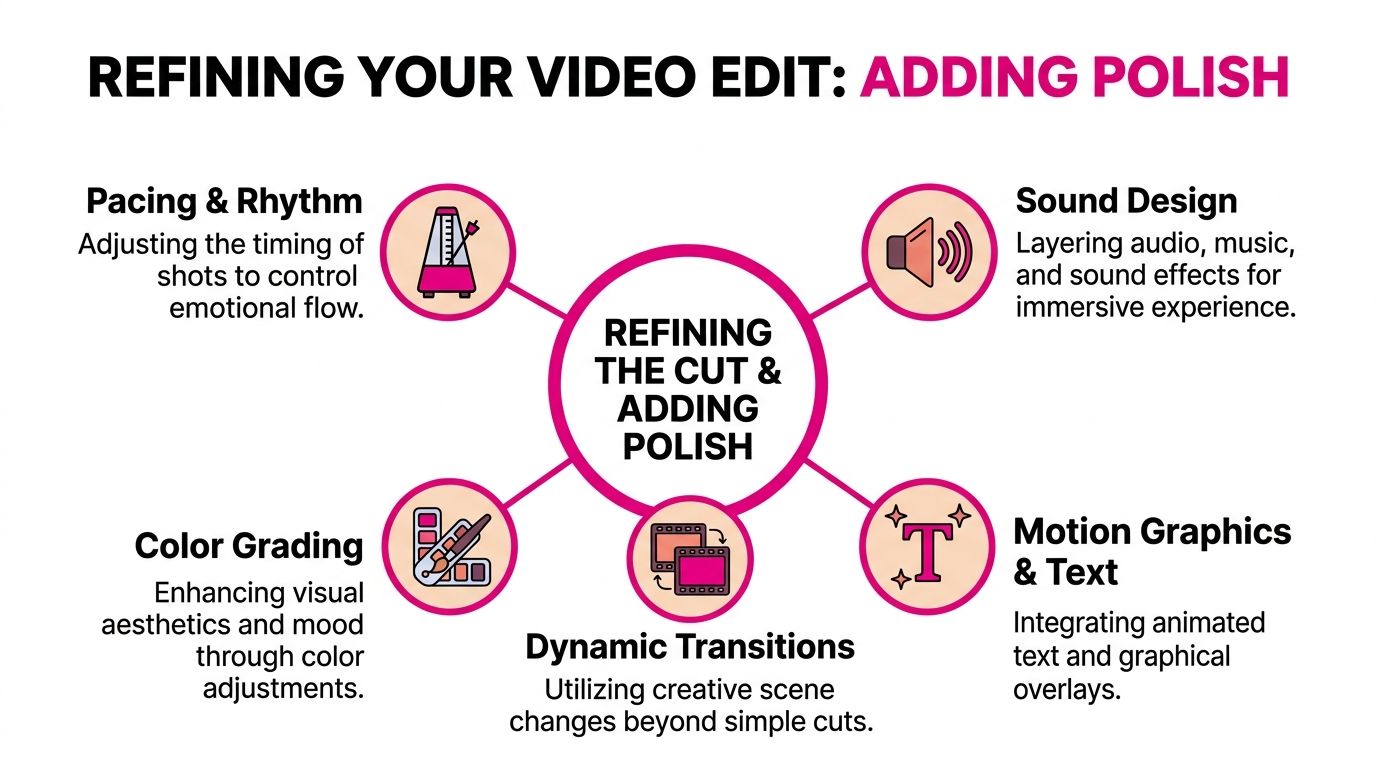
The fine cut is where pacing becomes intentional. The rough cut answered, “Does this sequence make sense?” The fine cut answers, “Does it move the way a viewer expects, or better yet, stay interesting without feeling forced?”
Start with spoken rhythm. Good dialogue editing is rarely about making speech as short as possible. It is about removing the pauses that stall meaning while keeping the breaths, hesitations, and reactions that carry tone. Cut too hard and the speaker sounds synthetic. Leave too much and the video feels uncertain.
J-cuts and L-cuts help more than new editors usually expect. Letting the next line arrive early can pull a viewer through a transition. Letting audio hang a beat after the picture changes can preserve emotion and soften a visual cut that would otherwise feel abrupt.
B-roll earns its place when it does one of four jobs: clarify, compress, cover, or reset attention. If a creator explains a process, supporting shots can replace extra explanation. If the only usable take has a rough splice, B-roll can hide it. If the frame gets visually stale, a cutaway gives the eye a break without breaking the thought.
A useful refinement pass focuses on a few specific checks:
- Dialogue timing: Trim hesitation that slows the point. Keep pauses that reveal confidence, doubt, or emphasis.
- Cut motivation: Make sure each cut changes information, perspective, or energy.
- B-roll placement: Use it where it adds evidence or solves a problem, not just because the track looks too static.
- Clip edges: Clean dead space at the beginning and end of shots unless that silence helps the moment land.
- Sound continuity: Listen for room tone jumps, clipped consonants, and music edits that call attention to themselves.
Fix sync issues before stacking polish on top. If dialogue still feels slippery or cuts stop matching the mouth, use a practical guide for syncing audio with video in common editing setups before you waste time trimming around a technical problem.
Polish after the structure holds
Picture lock matters because finishing work spreads outward. Once you add captions, motion graphics, sound design, cleanup, and color decisions, even a small structural change starts touching five other parts of the timeline.
Adobe's post-production guidance puts picture lock before color, mix, and delivery work for that reason, because locked timing prevents avoidable revisions later in the process, as explained in Adobe's overview of post-production workflow. In practice, this is less about theory than cost. Tight deadlines get blown when editors polish scenes that are still under debate.
Use picture lock as a real approval line:
- Lock story order: Stop shifting segments unless a clear problem justifies it.
- Confirm runtime: This matters for ads, lessons, sponsored segments, and platform limits.
- Approve spoken content: Graphics, subtitles, and cleanup all become slower if the wording keeps changing.
- Freeze timing for collaborators: Colorists, sound mixers, and designers work faster when durations stop moving.
This step protects messy real-world projects more than ideal ones. If your footage is limited, your options for hiding changes are limited too. A late structural note in a multicam interview can be annoying. A late structural note in a one-camera shoot with thin B-roll can force awkward patches, reframes, or extra graphics just to make the cut survive.
A polished unfinished edit is still unfinished.
Use AI where it removes drudgery
AI helps most when the job is repetitive and low-judgment. Transcript generation, caption drafts, silence detection, logging, and rough string-outs can save real time. Story decisions still need a human editor who understands emphasis, subtext, and when a pause is doing useful work.
That trade-off matters. A tool can detect silence, but it cannot reliably tell the difference between dead air and tension. It can draft captions, but it will still miss product names, technical terms, and intentional phrasing often enough that every line needs review.
Good uses of AI in the fine-cut stage:
- Transcription: Search interviews and long-form recordings faster.
- Caption drafting: Create a base file, then correct wording, timing, and punctuation manually.
- Silence detection: Speed up cleanup passes, then restore pauses that help performance.
- Scene logging: Sort long recordings into usable sections before detailed editing starts.
Bad uses are easy to spot. If every pause is trimmed to the same length, the speaker loses personality. If every sentence is cut on a formula, the edit starts sounding machine-made. Use AI for labor, not taste.
Editing Strategies for Imperfect Footage
Most editing advice assumes you shot enough coverage. Many creators didn't. They had one camera, limited time, no second take, and no chance to reshoot.
Stop assuming the footage will save you
That gap between ideal advice and real footage is bigger than people admit. 40% of indie creators and small businesses report shooting with minimal camera setups, according to Frame.io's discussion of no-coverage editing. That's why adaptive editing matters.
The usual linear workflow still applies, but the tactics change. You're no longer asking “which angle is best.” You're asking “how do I create variation without lying, distracting, or wrecking image quality.”
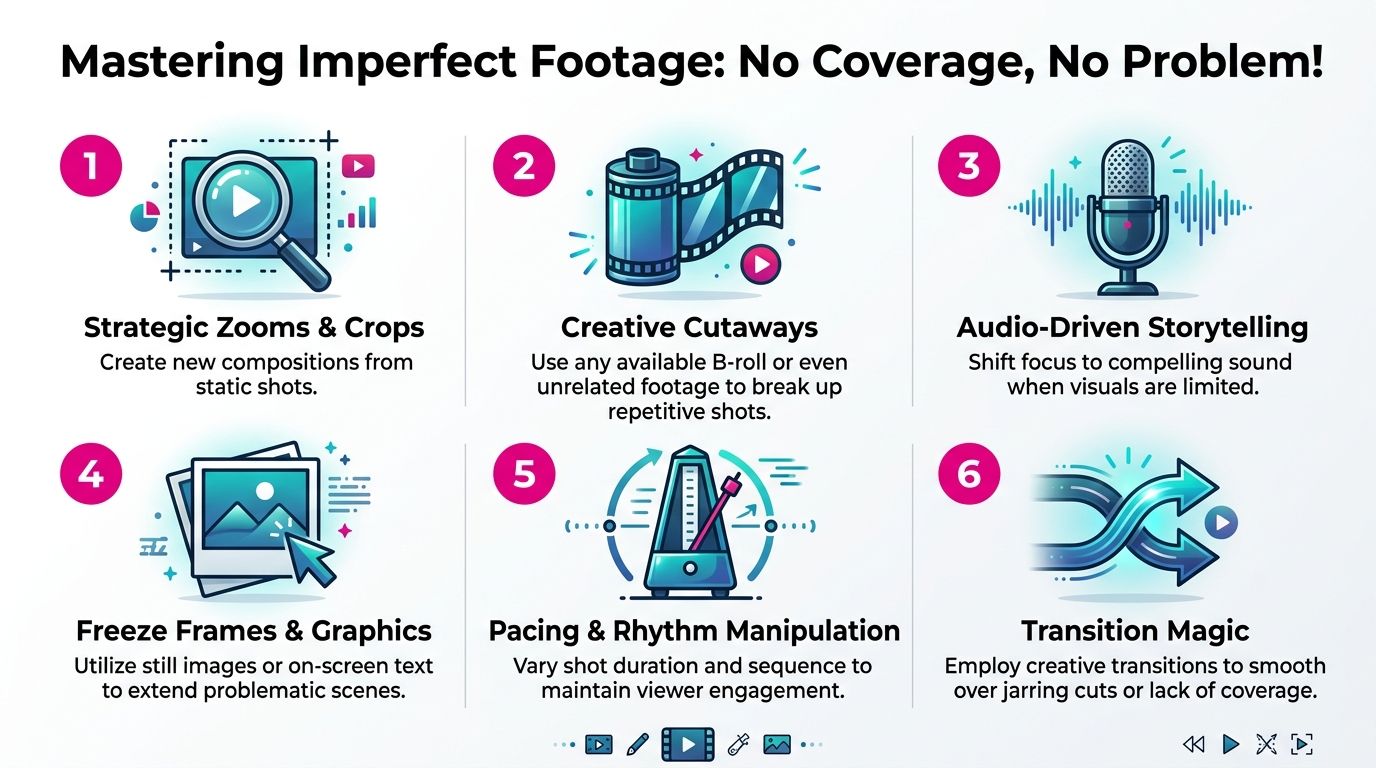
Here's what works when coverage is thin:
- Subtle reframing: A digital push-in can create a second composition if your footage has enough resolution headroom.
- Targeted crop choices: Zooming toward eyes, hands, or a product detail often feels intentional, not desperate.
- Cutaways from available material: Screens, notes, environment shots, over-the-shoulder moments, or UI captures can all carry a transition.
- Graphic interruption: On-screen text, chapter cards, lower-thirds, or diagrams can reset the eye and cover weak visual continuity.
If the audio is strong, protect it. Viewers will tolerate visual limitations longer than muddy dialogue. A focused pass on removing background noise in dialogue-heavy footage often improves a weak video more than another transition pack ever will.
Create variation without faking the story
The trap is overcompensation. Editors with weak coverage sometimes throw in aggressive punch-ins, flashy overlays, speed ramps, and transitions just to prove the edit is doing something. That usually makes the lack of footage more obvious.
Use controlled variation instead.
One reliable tactic is a checkerboard pattern of visual treatment. Stay wide. Then crop tighter. Return to the wider frame. Then break with B-roll or text. That rhythm creates perceived coverage from limited source material without confusing the viewer.
Another tactic is to let sound drive the sequence. If the spoken idea is compelling, you can cut to objects, reactions, screen captures, titles, or even a freeze frame while the audio carries the scene.
Limited footage doesn't force bad editing. It forces honest prioritization.
The question isn't whether you can mimic a multi-camera shoot perfectly. You usually can't. The question is whether you can preserve clarity, maintain attention, and hide the seams enough that the viewer stays with the message. That's what professional problem-solving looks like.
Exporting and Managing Client Feedback
A project can fall apart in the last 30 minutes.
The cut is approved internally, the export is rushed, captions shift on mobile, the music peaks too hot, and client notes arrive across email, text, and DMs. Now the problem is no longer editing. It is preventable cleanup. On tight turnarounds, that cleanup usually costs more time than the actual revision.
Export for the platform, not for your timeline
Exports should be built around the destination, not whatever settings happen to be sitting in the sequence. A file that looks clean in the edit bay can break down fast after upload if the aspect ratio, codec, bitrate, captions, or audio levels are wrong for the platform.
Social delivery usually rewards efficient files, clear text placement, and strong perceived sharpness after recompression. Broadcast and higher-end client delivery usually ask for mezzanine formats, stricter audio specs, and cleaner color legality. Those are different jobs. Treating them as the same is how good edits end up looking careless.
YouTube recommends using a high-quality upload format such as MP4 with H.264 video and AAC-LC audio, while also matching the frame rate to the source and using standard resolutions and aspect ratios for the intended presentation, according to YouTube's official upload encoding guidelines. For short-form vertical work, that usually means checking your 9:16 framing, text-safe margins, and compression behavior before the client ever sees the link.
A simple export checklist helps:
- Match the delivery shape: 9:16, 16:9, 1:1, or a custom client spec.
- Listen to the exported file: Timeline playback can hide audio problems.
- Watch the full render once on the target device: Phone for shorts, desktop for long-form, TV monitor for broadcast if available.
- Check captions, lower thirds, and end cards: These are common failure points after export.
- Use version names that survive handoff:
Project_Review_v01,Project_RevB,Project_Final_Master.
One more hard-earned rule. Export a review copy and a master separately. Review files should be small enough to share quickly. Masters should preserve as much quality as the delivery requires. Combining those two goals into one file often serves neither.
Build a feedback system that people can follow
Revision rounds get expensive when notes are vague or scattered. "Make it faster." "Can we add more energy?" "The middle drags a little." Those comments are common, but they do not tell an editor what to change, where to change it, or who made the final call.
Frame.io's 2024 Workflow Benchmark Report found that teams using centralized review and approval workflows report faster approvals and fewer communication bottlenecks than teams relying on fragmented feedback channels, especially in distributed production environments. The lesson is practical. Put every note in one place, attach it to a timestamp, and keep decision-makers in the same review thread.
Use a review process with clear rules:
- One link per cut: Don't split notes across email, chat, and text.
- Timestamp every comment: Each request should point to a specific moment.
- Label the type of note: Story, pacing, graphics, audio, captions, or delivery.
- Consolidate approvals: One collected client response is better than five separate opinions.
- Reply with actions, not just acknowledgments: Confirm what changed, what stayed, and why.
That structure matters even more on imperfect projects. If the footage is limited and the deadline is tight, the team has less room for subjective wandering. Timestamped notes force sharper decisions. They also help clients see the trade-off between "fixing" a moment and opening a larger re-edit.
Vague feedback creates extra labor because it hides the real decision.
I often push clients to separate structural notes from finish notes. Story, pacing, and missing information come first. Music tweaks, caption style, and micro timing come after the cut is approved. Mixing those two layers in the same round wastes attention and invites reversals.
Versioning is part of editing
Version control is part of the craft. It protects approved work and makes revisions traceable when the project gets messy.
Keep one working project file. Save milestone versions before major changes. Archive every approved export. If a client asks to "go back to the one before the testimonial swap, but keep the new CTA," you need to know exactly where that version lives and what changed between cuts.
Editors either look calm or look disorganized. The difference is rarely talent. It is naming discipline, folder structure, and a short revision log that records what each version solved.
A steady delivery process builds trust because clients can feel the difference. Files arrive labeled correctly. Notes come back cleaner. Approvals happen faster. And when the footage was never ideal to begin with, that control at the end of the workflow is often what makes the whole project feel professional.
Conclusion From Process to Practice
A reliable video editing workflow is less about software than about judgment. It helps you decide what to do now, what to delay, and what to lock before the next layer begins. That's what keeps messy projects from turning into expensive rework.
The creators who improve fastest aren't always the ones with the best footage. They're the ones who can organize quickly, build a strong rough cut, refine with discipline, and solve problems when the coverage falls short. That's a practical advantage, not a theoretical one.
The workflow itself is also changing. The shift toward remote collaboration is one reason cloud-based workflows are projected to expand at an 8.23% CAGR from 2025 to 2031, according to Mordor Intelligence's video editing market report. Tools will keep changing. The need for clear structure, clean approvals, and adaptable editing judgment won't.
Use the ideal workflow when the project allows it. Use the adaptive one when reality interferes. The key advantage is knowing the difference.
If you want a team that can handle the heavy lifting for your channel or content pipeline, Your Video Editor provides professional editing for long-form videos, short-form vertical content, thumbnails, graphics, and managed revision workflows through a timestamped client portal.