You're usually not reading about audio sync when everything is going well. You're reading because you dropped a clean external WAV under your camera clip, hit play, and something feels wrong. The mouth moves first. Or the words land early. Or it starts fine and drifts off halfway through an interview.
That moment frustrates almost everyone at first, because sync problems look mysterious from the outside. In practice, they're usually not mysterious at all. They come from a handful of causes: no clear sync point, weak camera scratch audio, mismatched settings, long-form drift, silent multi-cam footage, or a hardware combination that's consistently late by the same amount every time.
The good news is that learning how to sync audio with video isn't about memorizing one trick. It's about building a workflow that starts before you record, continues through your edit, and gives you reliable fixes when the easy tools fail.
Table of Contents
- Why Accurate Sync Shapes How Viewers Judge Your Video
- Prep for Success A Planned Sync Is an Easy Sync
- The Manual Method Mastering Waveform Alignment
- Automatic Sync Tools in Premiere Final Cut and Resolve
- Advanced Sync Workflows Multi-Cam Timecode and Drift
- Troubleshooting Common Sync Nightmares
- Frequently Asked Audio Sync Questions
Why Accurate Sync Shapes How Viewers Judge Your Video
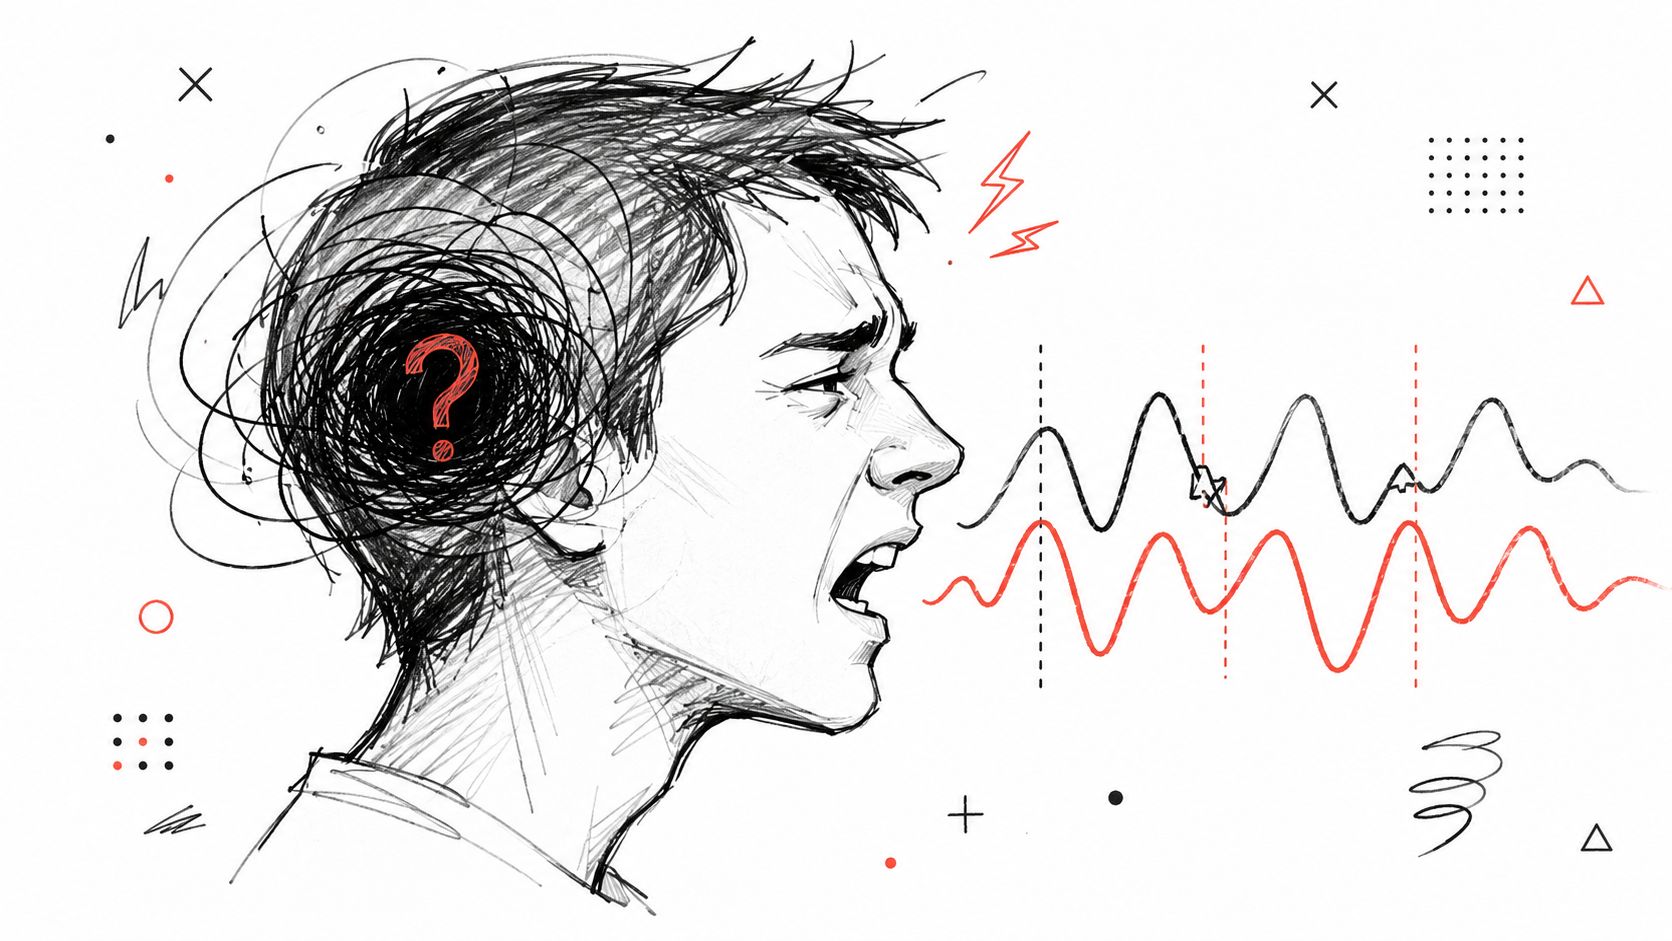
A talking-head edit can look clean, be color-corrected well, and still feel wrong within seconds if the voice lands a fraction late. Viewers rarely describe that problem in technical terms. They just stop trusting what they are seeing.
That reaction matters more than many new editors expect. Sync errors make dialogue feel detached from the speaker, weaken authority, and make even good footage read as amateur. In client work, training content, interviews, and any piece built around speech, people will forgive average lighting before they forgive a drifting voice.
What viewers notice before they know why
Editors measure sync by frames, samples, and waveform position. Audiences feel it as friction.
If a presenter's mouth closes before the line finishes, the brain catches it immediately. If the error is small but consistent, the video feels tiring to watch. If the offset changes over time, the audience assumes the whole production is unstable. That is why sync is not just a finishing detail. It affects comfort, clarity, and credibility from the first line of dialogue.
I tell junior editors to trust that instinct. If sync feels slightly off, fix it now. Dialogue-heavy edits do not survive “close enough.”
Better sound usually creates a harder post workflow
The same productions that sound best often create the most sync work. A camera records reference audio. A lav, shotgun, field recorder, or phone captures the track you want to use. That trade-off is usually worth it because cleaner dialogue gives you far more control in the edit, especially in interviews and voice-over driven video projects.
It also means sync has to be treated as a workflow, not a single button press.
Good editors prevent problems before the shoot, align clips efficiently in post, and keep a backup plan for the jobs that break normal methods. That includes the annoying cases tutorials skip over, like cameras with poor scratch audio, a recorder that is always a few frames late, or multi-cam footage with no usable waveform at all. Those are not edge cases for long. They show up on real projects all the time.
Prep for Success A Planned Sync Is an Easy Sync
Most sync disasters begin before the edit. They start on set, at a desk, or in a conference room where nobody took a minute to make the footage easy to line up later.
The easiest project to sync is the one that was recorded with sync in mind. That means giving yourself a visible action and a sharp sound at the beginning, matching your technical settings, and making sure every device captures something useful.
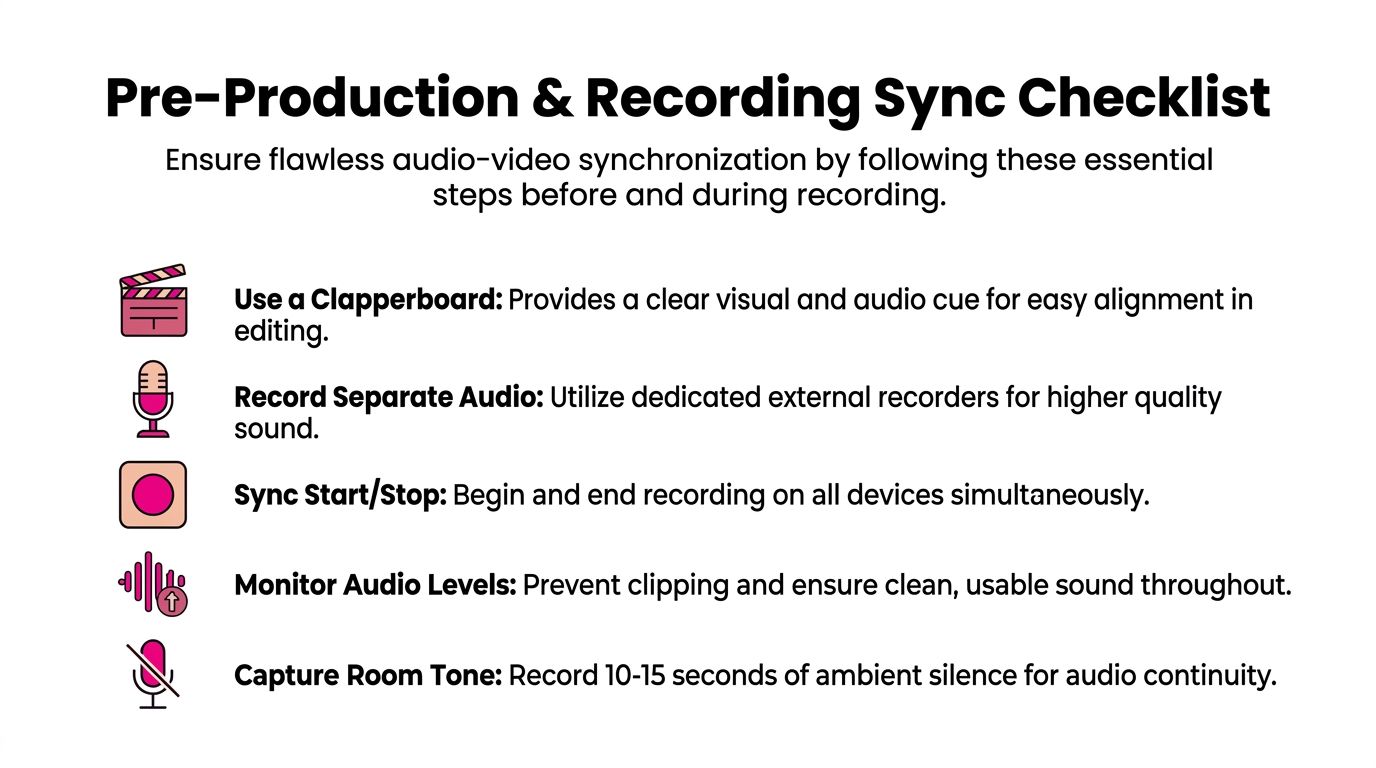
The checklist that prevents most sync headaches
Use this before every interview, podcast, lesson, or multi-camera shoot:
- Create a clear sync mark: Use a clapperboard if you have one. If you don't, a hand clap works. What matters is the combination of a visible closing action and a sharp sound.
- Match project settings early: A major cause of drift is sample rate mismatch. Recording 48kHz audio and placing it in a 44.1kHz project can cause cumulative sync errors over time, and the fix is to conform the audio to the project standard after import, as explained in this audio sync guide on sample rate mismatch.
- Record camera scratch audio: Even ugly onboard audio can save an edit. Auto-sync tools need something to compare.
- Run a test clip: Record a short sample, import it, and confirm it behaves properly before the actual production starts.
- Keep starts organized: If one camera rolls late or the recorder starts long before the scene, syncing is still possible, but you've made the search harder.
Good prep is mostly about reference, not perfection
A junior editor often thinks the camera audio has to sound good. It doesn't. It just has to exist and resemble the same event the external recorder captured. That scratch track is the scaffold for waveform matching.
If you're recording narration or guided dialogue, it also helps to keep the performance workflow clean. A well-planned video editing with voice over workflow reduces the chances that you'll be patching timing problems later.
A sharp clap at the start can save more time than any plugin you install after the fact.
What prep gets wrong in real life
The biggest practical mistake isn't forgetting the clap. It's assuming all devices share the same settings just because they're modern. Cameras, phones, recorders, and editing timelines don't automatically agree.
Check the recorder. Check the camera. Check the project. Then test.
That habit feels small until you're staring at a long interview that starts synced and slowly falls apart.
The Manual Method Mastering Waveform Alignment
Manual sync is the fallback that saves real projects. Auto-sync misses more often than people expect once you add crowd noise, weak scratch audio, long recorder pre-roll, or a camera clip with almost nothing usable on it.
The job is simple in principle. Find one event that exists in both places, match it precisely, then prove the sync holds in playback. The event might be a slate close, a hand clap, a drum hit, a door slam, or the first clean consonant in speech. Editors who get good at this stop treating sync like a button and start treating it like a repeatable workflow.
How to line up a clip without guessing
Put the camera clip and the external audio on separate tracks. Turn on large waveforms. Then zoom in far enough that you can see transient peaks clearly, because broad timeline views hide small timing errors.
Use this order:
- Find the sync event in the picture. Park on the exact frame where the slate closes, hands touch, or the visible impact happens.
- Set a marker if your NLE allows it. Markers keep you from chasing the same frame twice.
- Find the matching transient in the external recording. Look for the sharp spike, not a rounded rise.
- Align to the point of contact. The correct frame is the instant the action happens, not the frame before motion finishes.
- Play through the next few seconds. Check speech right away, especially mouth closures and hard consonants.
- Mute or disable the camera scratch track. Otherwise you may hear comb filtering or echo and mistake it for bad sync.
- Link, merge, or create a synced clip. Unlinked clips drift out of alignment from one careless trim.
One practical habit helps a lot. After the first alignment, jump 20 to 30 seconds later and check sync again before you start cutting. If it already feels soft there, you may be looking at drift or a recorder offset instead of a bad initial line-up.
What to watch for in the waveform
Beginners often chase the tallest peak. That works sometimes, but not always. A clap usually produces a steep front edge followed by a larger rebound in the room. The sync point is usually the first clean transient, not the echo or the second bump.
Speech can work too, but choose it carefully. Plosives such as P, B, T, and K are easier to match than vowels. A laugh, cough, mic bump, or table tap is often even better.
If you're cutting in Apple's editor, this is one of several small workflow differences that separates it from Adobe. A good Final Cut Pro vs Adobe Premiere Pro comparison helps when you're deciding which tools make this kind of detailed timeline work faster for you.
Sync by eye first. Confirm by ear second.
What “in sync” actually means
A waveform can look right and still play wrong. Human perception catches lip-sync errors fast, especially on close-ups. That is why playback matters more than a pretty visual match.
Check three things:
- Lip closures on M, B, and P sounds
- Sharp impacts such as claps, stick hits, or footfalls
- Consistency over time rather than only the first second
I trust a close-up of speech more than the waveform once the rough alignment is done. If the mouth closes and the sound arrives late, the sync is late. Keep nudging until it disappears.
Common manual sync mistakes
These are the errors I see junior editors make on their first difficult sync job:
- Using a vague visual cue. A slow hand movement is harder to place than a clear contact frame.
- Stopping after the first match. A clip can start in sync and still drift later.
- Leaving both audio sources active. That creates a doubled sound that mimics bad sync.
- Ignoring consistent offset. Some camera and recorder combinations are always a little early or late in the same direction.
- Trusting the timeline more than playback. Sync is judged in motion, not in a paused screenshot.
That last point matters on multi-camera shoots and phone footage. One device may be consistently offset by a small amount across every take. Once you spot that pattern, stop fixing each clip from scratch. Apply the same correction, then verify it. That is faster, and it turns manual sync from rescue work into a controlled process.
Manual sync takes longer than pressing an auto-match command. It also teaches the part many tutorials skip. Good syncing starts before the edit, but when the easy methods fail, you still need to recognize transients, judge speech, spot drift, and know whether you're fixing a one-off error or a system-wide offset.
Automatic Sync Tools in Premiere Final Cut and Resolve
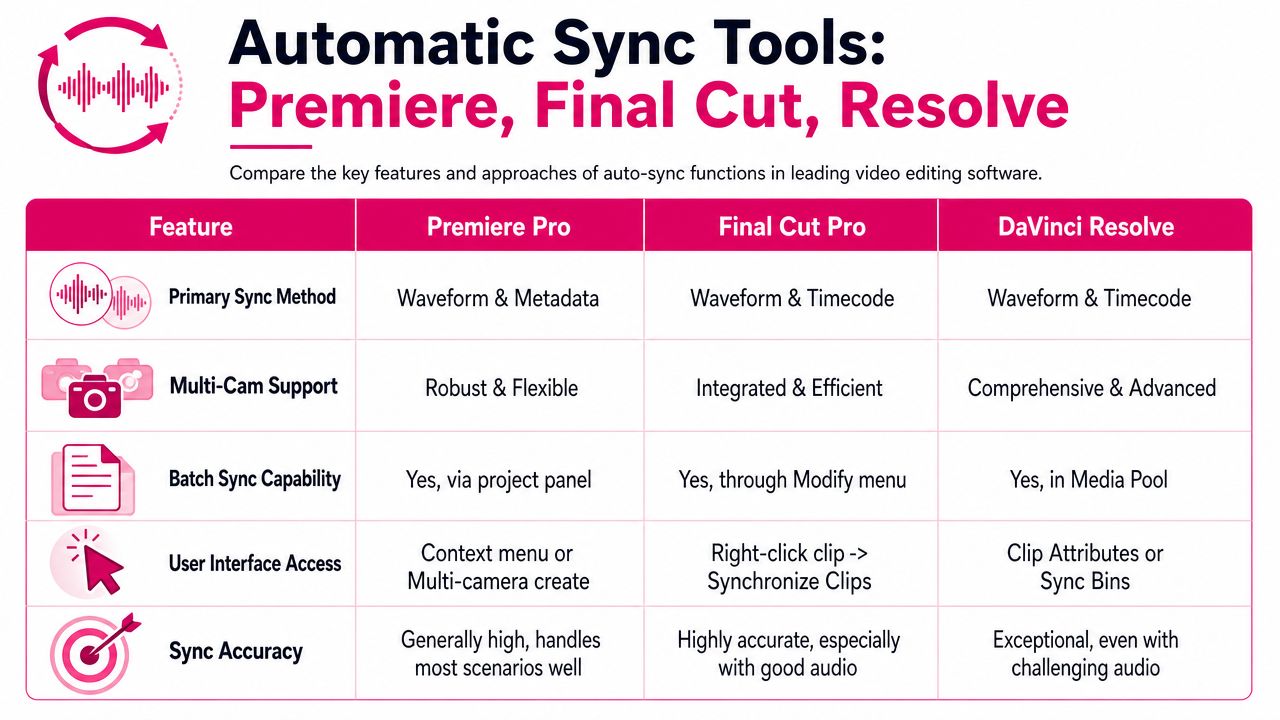
Auto-sync should be your first pass on most edits. When the camera captured usable scratch audio and the recorder caught the same moment cleanly, Premiere, Final Cut, and Resolve can save a lot of timeline work.
The catch is simple. Fast does not mean verified.
What auto-sync is doing
These tools compare waveform patterns between the camera track and the external recording. They match peaks, spacing, and repeating timing patterns. They do not understand dialogue context, and they do not know which source is the better editorial choice. They only know whether two audio shapes appear to belong together.
That matters because auto-sync can be right at the start and still be wrong for the full clip. It can also fail for reasons that are easy to miss on a first pass, such as weak onboard audio, clipped scratch tracks, or a recorder that started a fraction late on every take.
If you are still deciding which editor fits your overall workflow, this comparison of Final Cut vs Adobe Premiere Pro is a useful side-by-side read.
Premiere Pro
Premiere gives you a few practical options, and each one suits a different stage of the workflow.
For a straightforward camera-plus-recorder setup, select the clips, right-click, and use Synchronize with audio. That is the quickest way to test whether the scratch track is good enough. If it works, great. If it misses, do not keep rerunning the same command without checking the source audio first.
Merge Clips can help when you want one clip that behaves like a single synced asset in the bin. Some editors like that for interviews and simple documentary projects. Others avoid it because merged clips can be less flexible later, especially if the edit grows into a larger multicam or relink-heavy project. My rule is simple. Use merged clips for clean, contained jobs. Use sequences or multicam workflows when the project is likely to get more complicated.
Premiere also supports timecode-based sync. That is the better choice when your production planned for sync properly and the devices were jammed correctly before shooting.
Final Cut Pro and DaVinci Resolve
Final Cut Pro is fast on lean projects. Select the clips, run the sync command, and it creates a synced clip that is easy to cut with. For interviews, branded content, and event recaps, that speed is hard to argue with.
DaVinci Resolve is strong when the project is heading toward multicam, roundtrips, or a heavier finishing workflow. Its sync bins and media management make more sense as the number of angles and audio sources grows. Resolve also feels more comfortable once timecode enters the picture and the job needs structure, not just a quick match.
Use the tool that matches the project shape, not the one you happen to know best.
Auto-sync works best when the prep was handled well. Clear file names, organized bins, and usable scratch audio make the software look smarter than it is.
When automatic sync fails
Most failed sync attempts fall into a few predictable categories:
| Problem | Why it fails | Better approach |
|---|---|---|
| Noisy scratch audio | Waveform pattern is hard to match | Clean the reference track if possible, or sync manually |
| Silent camera clips | There is no waveform to compare | Use timecode or a visual sync point |
| Very long recordings | Start may align, but drift appears later | Check sample rate, frame rate, and recorder settings |
| Similar repeated sounds | The software grabs the wrong moment | Trim to a narrower range and verify by eye and ear |
One more failure point deserves attention because many tutorials skip it. Some camera and recorder combinations are consistently offset in the same direction across every take. Auto-sync may line them up close enough to look right on the waveform while speech still feels late or early. When you spot that pattern, stop treating it like random error. Apply the same correction across the affected clips, then confirm it on playback.
That is where sync stops being a button click and becomes a workflow.
A short walkthrough can help if you want to watch the process in action.
Advanced Sync Workflows Multi-Cam Timecode and Drift
Once you move beyond a single camera and one recorder, sync stops being a clip-by-clip task. It becomes a system.
The editor's job is to decide what the master reference is. Sometimes that's the external recorder. Sometimes it's timecode. Sometimes it's one visible event that every camera can see. If you don't decide that early, multi-cam timelines get messy fast.
Multi-cam with one master audio source
For interviews, podcasts, roundtables, and event coverage, the cleanest workflow is often to treat one high-quality audio source as the backbone of the edit. Then align every camera angle to that source and build your multicam sequence from there.
This works well when every camera recorded some form of scratch audio. The software can compare each angle's onboard track against the master recorder and line them up into one synced group.
That gives you two benefits:
- Cleaner switching: Every angle shares the same dialogue timing.
- Simpler repairs: If one camera clip slips or gets replaced, you're syncing back to one known source instead of guessing against multiple imperfect references.
When silent cameras break waveform sync
Some professional setups record video with camera audio disabled or unusable. That breaks the assumption most tutorials make, which is that every angle has a waveform to compare.
In those cases, waveform sync isn't the answer. A documented pro workflow for silent multi-cam shoots is visual cue locking combined with frame-accurate timecode synchronization, described in this multi-cam sync discussion for silent cameras.
That means you rely on one of two anchors:
- A visual event: a clap, a hand raise, a flash, a slate, or another action visible to all cameras.
- Shared timecode: each device carries matching frame addresses, so clips line up by metadata rather than sound.
Timecode is the cleanest option when it's available. Think of it as a digital slate attached to every frame.
Drift over long recordings
Drift is different from a bad initial sync. A bad initial sync is wrong from the start. Drift starts right and gets worse later.
The usual cause is clock mismatch between devices. One recorder runs a little differently from the camera over a long capture. The fix depends on what caused it:
- If the audio was imported into the wrong project sample rate, conform or interpret it properly.
- If the device clocks differ across a long take, you may need to rate-stretch slightly or split the clip and realign in sections.
- If timecode exists, use it first and verify the full take before extensive editing.
Editors often blame drift on the timeline, but long-form sync problems usually come from the recorded media or the device relationship, not from a random glitch inside the software.
Troubleshooting Common Sync Nightmares
Most sync problems feel chaotic when you're in the middle of them. They usually aren't. They're patterns. Once you identify which pattern you're seeing, the fix gets much faster.
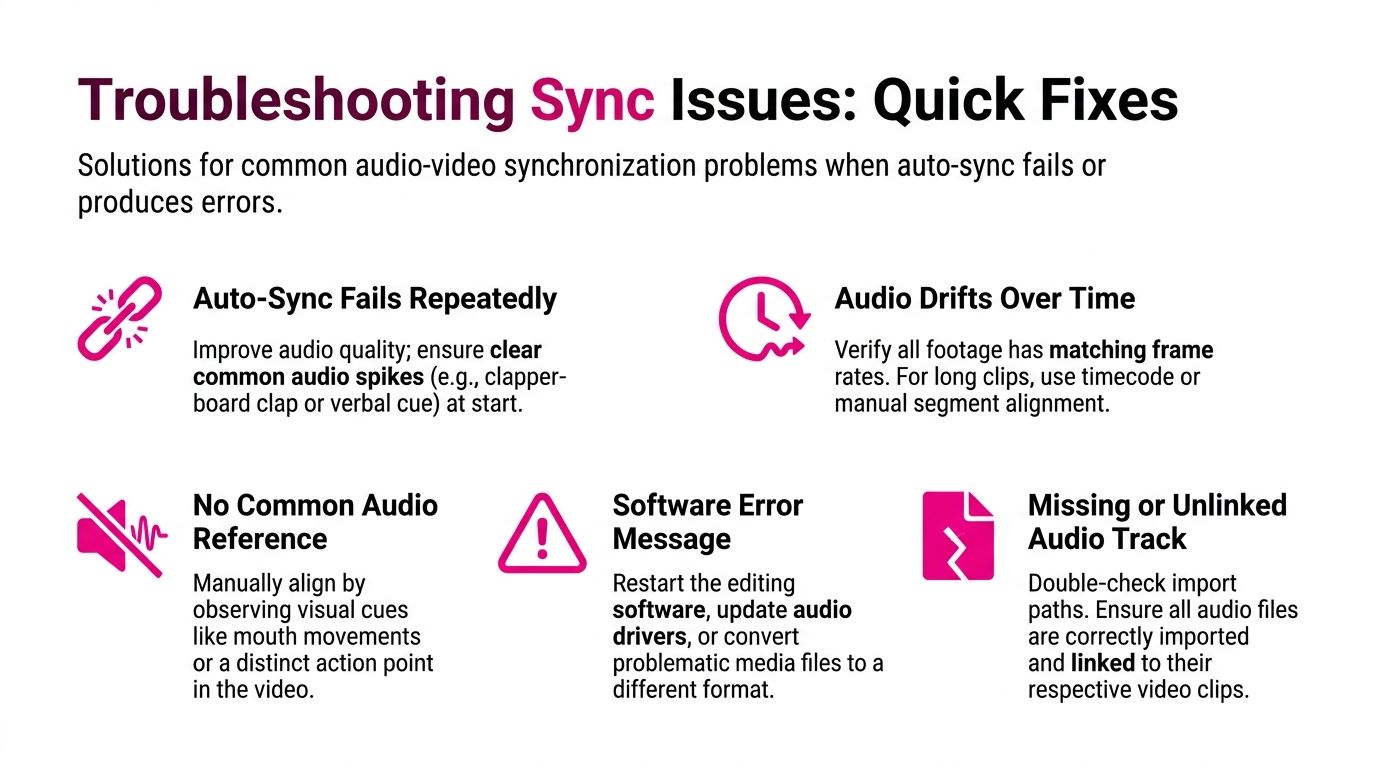
When auto-sync keeps failing
Start with diagnosis, not retries.
- Check the reference audio: If the camera scratch track is noisy, distant, or distorted, waveform matching may never lock well.
- Check the clip boundaries: If the selected clips include long dead sections before the usable sound begins, the software has more room to guess wrong.
- Check your imports: Missing links, odd transcodes, and media glitches can create sync errors that look like timing problems.
- Check the audio itself: If the scratch track is full of hum or environment noise, cleaning it first can help. A practical background noise removal workflow can make weak reference audio more usable.
If sync fails the same way more than once, stop treating it like a random error.
The consistent offset strategy
One of the most overlooked fixes in editing is the idea that some hardware pairs are consistently wrong, not randomly wrong. Many setups produce a fixed latency offset. An underused professional workflow is to measure that offset once, such as -450ms, and apply a global audio delay to future clips, as discussed in this editor conversation about fixed sync offsets.
That changes the whole job.
Instead of manually nudging every single clip in a shoot, you calibrate the device pair once for that session and apply the correction across the board. If the offset repeats reliably, you've turned a recurring annoyance into a preset.
A few signs you're dealing with fixed offset instead of random misalignment:
- Every clip is late by the same amount
- Different takes show the same timing error
- The problem appears only with one camera-recorder pairing
- Short clips and long clips begin equally wrong
Measure once. Save the correction. Reuse it while that setup stays unchanged.
Frequently Asked Audio Sync Questions
What if I forgot to clap at the start
Use the next best shared event. A word with a visible mouth closure, a table tap, a door close, a footstep, or a hand gesture that creates sound can all work.
If there's no useful audio reference at all, sync visually. Match lip movement, impacts, or a repeated gesture. It's slower, but it works when the footage gives you no better option.
Why does sync drift on long clips
Drift usually means the files didn't stay locked over the full recording. That can come from mismatched device clocks or from project interpretation problems after import.
The fix depends on the cause. If the problem grows gradually, inspect the media settings first. If it starts correct and slips later, try conforming, interpreting, or segmenting the clip instead of just nudging the whole file.
What about phone footage that won't stay synced
Phone footage sometimes behaves badly in an edit because the recording format isn't as timeline-friendly as footage from dedicated cameras. If a clip refuses to stay locked, transcode it to an editing-friendly format before syncing.
That's especially worth trying when sync seems inconsistent even though your waveform alignment was correct.
Should I sync before or after editing
Sync before serious cutting whenever possible. Once the external audio is correctly attached to the picture, every trim, multicam switch, and dialogue decision becomes easier.
Trying to fix sync deep into the edit usually creates more cleanup work.
When should I stop and do it manually
The moment auto-sync gives you a doubtful result and playback feels wrong. Don't keep rerunning the same tool and hoping for a different outcome. Manual alignment is often faster than repeated failed automation.
If you'd rather spend your time creating than fixing clip drift, waveform mismatches, and multi-cam sync errors, Your Video Editor can handle the post-production side for you. Their team works on long-form videos, shorts, podcasts, interviews, multi-cam edits, audio cleanup, graphics, and revision workflows, so you can hand off the technical friction and get back to publishing.