You record a strong take. The delivery is clean, the pacing is right, and you finally feel done. Then playback starts and you hear another track underneath the track. HVAC hum. Laptop fan. Street wash from a half-open window. Maybe a dog bark right in the middle of your best sentence.
That's the moment the search often begins for a magic “remove background noise” button. Sometimes that works. Often it doesn't. Software is good at reducing certain kinds of noise, especially steady noise that stays consistent through the whole recording. It's much worse at fixing irregular distractions without damaging the voice you're trying to keep.
The practical way to approach how to remove background noise is to think in two stages. First, prevent as much of it as possible before recording. Second, match the cleanup method to the specific problem in the file. If you skip the diagnosis step, you usually end up with the classic result: less noise, but worse audio.
Clean audio is rarely about one plugin. It's about room choice, mic placement, gain, listening discipline, and using the lightest possible repair in post. For casual content, a decent DIY workflow is often enough. For interviews, client work, course material, or anything you can't re-record, there's a point where pushing denoise further only makes the audio sound smaller, swirly, and fake.
Table of Contents
- Introduction
- Prevention First How to Record Cleaner Audio
- Diagnose Your Noise Before You Treat It
- The Standard Audio Cleanup Toolkit Explained
- Noise Removal Workflows in Popular Editing Software
- Advanced Techniques and When to Hire a Professional
Introduction
Background noise usually isn't one problem. It's a stack of problems. A low hum may be easy to tame. Reverb from a bare room may be harder. Intermittent traffic, chair creaks, or barking dogs are a different category entirely, and they're where most “easy” tutorials fall apart.
That matters because the wrong cleanup method can make a recording sound worse than the original. A heavy denoiser can shave off hiss, but it can also smear consonants, flatten the room tone unnaturally, and leave the voice with that underwater texture everyone recognizes immediately. If the noise changes constantly, broad reduction across the whole file is often the bluntest tool you could choose.
A better workflow starts with one question: what kind of noise is it? If it's steady, you can often use a noise profile, gentle EQ, or a gate between phrases. If it's intermittent, you're usually looking at manual editing, selective spectral repair, or accepting that some sounds can only be reduced, not erased.
Clean audio comes from restraint. The best fix is usually the smallest one that solves the problem without announcing itself.
That's also why prevention beats repair. Once noise is baked into the recording, every attempt to remove it risks taking part of the voice with it. If you can lower the noise floor before recording, you preserve far more detail and need far less processing later.
For quick social content, “good enough” cleanup is often fine. For branded work, interviews, courses, and podcasts, the bar is different. In those cases, preserving natural speech matters more than forcing the background to absolute silence.
Prevention First How to Record Cleaner Audio
You finish a take that felt solid, then play it back and hear the problem. A truck passes halfway through the sentence, the room sounds boxy, and your mic picked up more space than voice. At that point, cleanup becomes damage control. For hiss, software can often help. For barking dogs, traffic swells, and ugly room reflections, prevention does far more than post ever will.
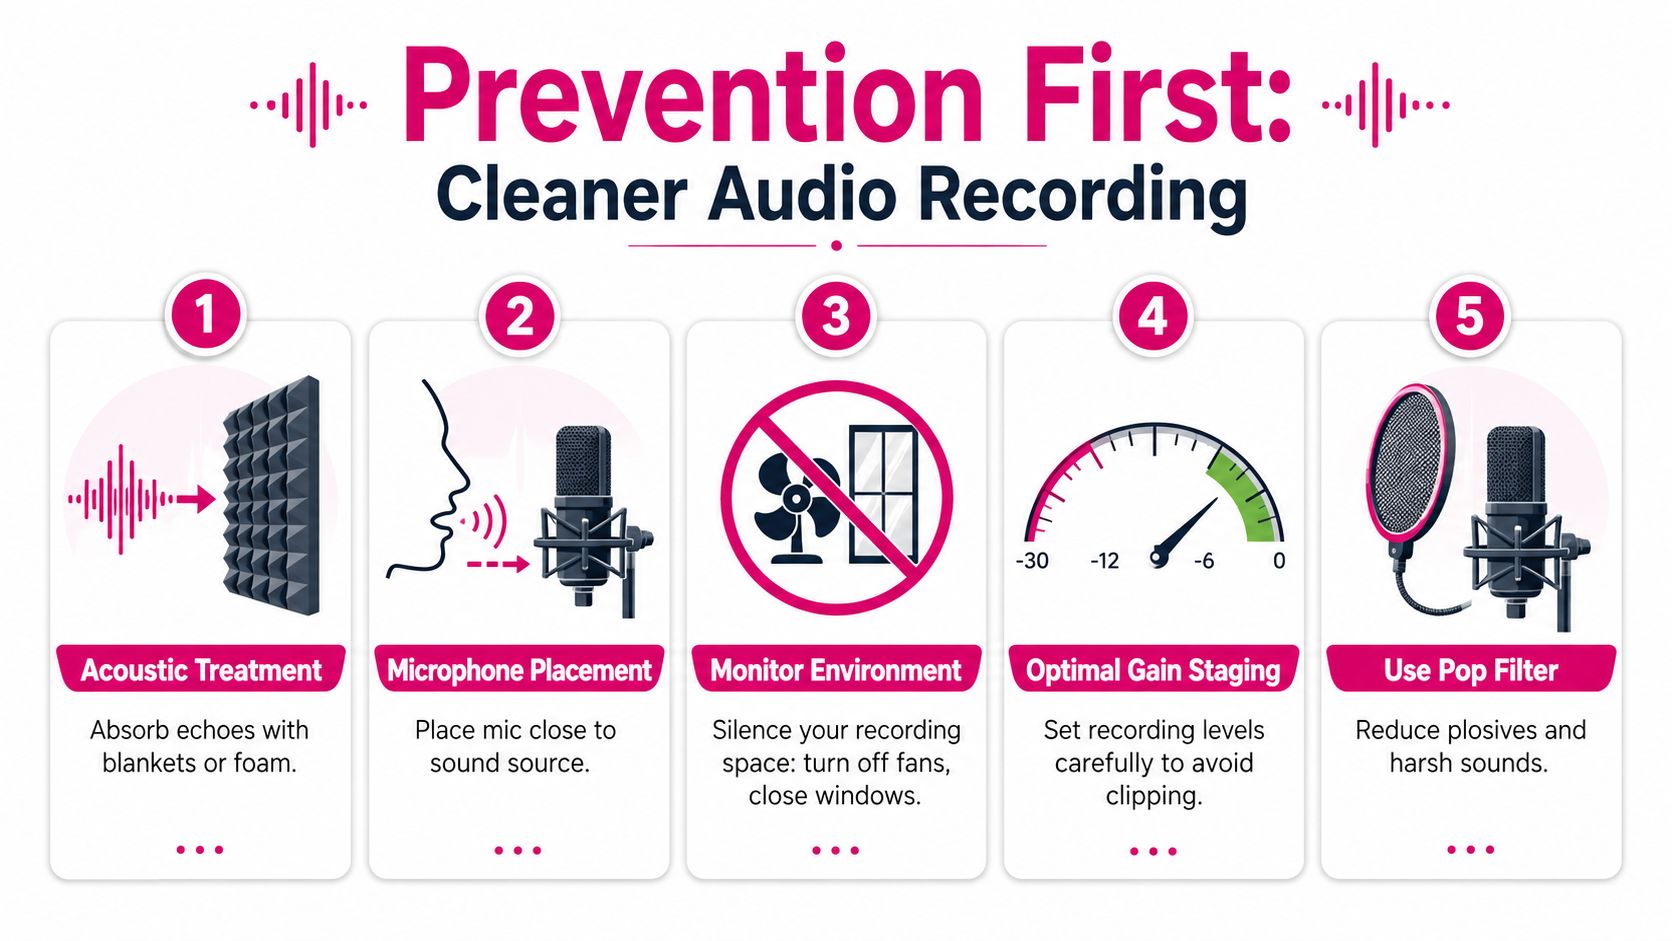
Treat the room before you treat the file
Room sound is often the first thing that makes audio feel amateur, even when the mic itself is decent. Hard walls, desktops, windows, and empty corners reflect your voice back into the capsule a split second later. That reflection is not separate from the speech. It sits on top of it, which means cleanup tools have very little clean material to work with.
Cheap treatment goes a long way if you place it where it matters. Put soft material behind and beside the speaker, not just somewhere else in the room. Record away from windows, vents, and corners. If the room has a strong slap or ring when you clap once, fix that before opening a denoiser.
A few practical fixes usually give the best return:
- Use absorption near the mic position: Curtains, rugs, moving blankets, cushions, and clothes racks help more than a decorative foam tile on a far wall.
- Break up reflective surfaces: Bookshelves, fabric furniture, and uneven surfaces reduce flutter echo better than a bare wall.
- Choose the quietest part of the room: A bedroom full of soft furnishings often beats a stylish office with glass and hardwood.
- Kill mechanical noise at the source: Fans, air purifiers, buzzing lights, laptop cooling, and desk vibrations are easier to stop than remove later.
If you publish regularly, cleaner capture also makes the edit faster. A good overview of that bigger workflow is this guide to video editing with voice over for cleaner productions.
Get the microphone closer
Distance controls noise more than any plugin chain. Every inch you move the mic away gives the room more authority and makes outside sounds feel louder relative to the voice. For spoken content, a close mic usually beats an expensive mic placed too far away.
A practical target is 6 to 12 inches from your mouth. Closer than that can sound too bass-heavy on some voices and increases plosives if technique is poor. Farther than that often pulls in more room tone, keyboard noise, and traffic than creators expect.
Use placement on purpose:
- Aim the mic at the mouth, not the chest or desk area.
- Use a pop filter so you can stay close without plosive blasts.
- Monitor on headphones while setting position. You will catch hum, rustling, and street noise before the actual take.
- Set gain so normal speech peaks safely. Recording at a low level forces you to boost both voice and background later.
I would rather hear a modest dynamic mic used properly at close range than a premium condenser across the desk in a reflective room. That trade-off matters.
Build a short pre-record routine
A repeatable setup beats guessing. High-stakes projects, branded content, interviews, and course material benefit from a 30-second check every time because rerecording is expensive and heavy restoration rarely sounds invisible.
Use this sequence before you start:
- Stand still and listen to the room for ten seconds.
- Turn off anything with a motor or fan.
- Close windows and pause noisy appliances if possible.
- Place the mic close enough that your voice clearly dominates the room.
- Record a short sample and listen back on headphones.
- Fix the environment first, then record the final take.
One rule holds up in almost every home setup. If a noise is obvious to your ears before recording, it will be harder to hide than you think once speech is on top of it.
DIY prevention is usually enough for YouTube videos, social clips, and internal content. For ads, documentaries, executive interviews, and anything that has one chance to land, getting the recording right on set is still the safest path.
Diagnose Your Noise Before You Treat It
A creator records a strong take, opens the edit, hears a dog bark under one sentence and traffic swell under the next, then reaches for a denoiser preset that was designed for steady hiss. That is how usable dialogue turns metallic fast.
The first job is diagnosis. If you misidentify the noise, the cleanup tool often does more damage than the original problem. Constant fan noise and a single chair squeak may both be distracting, but they are not the same restoration job.
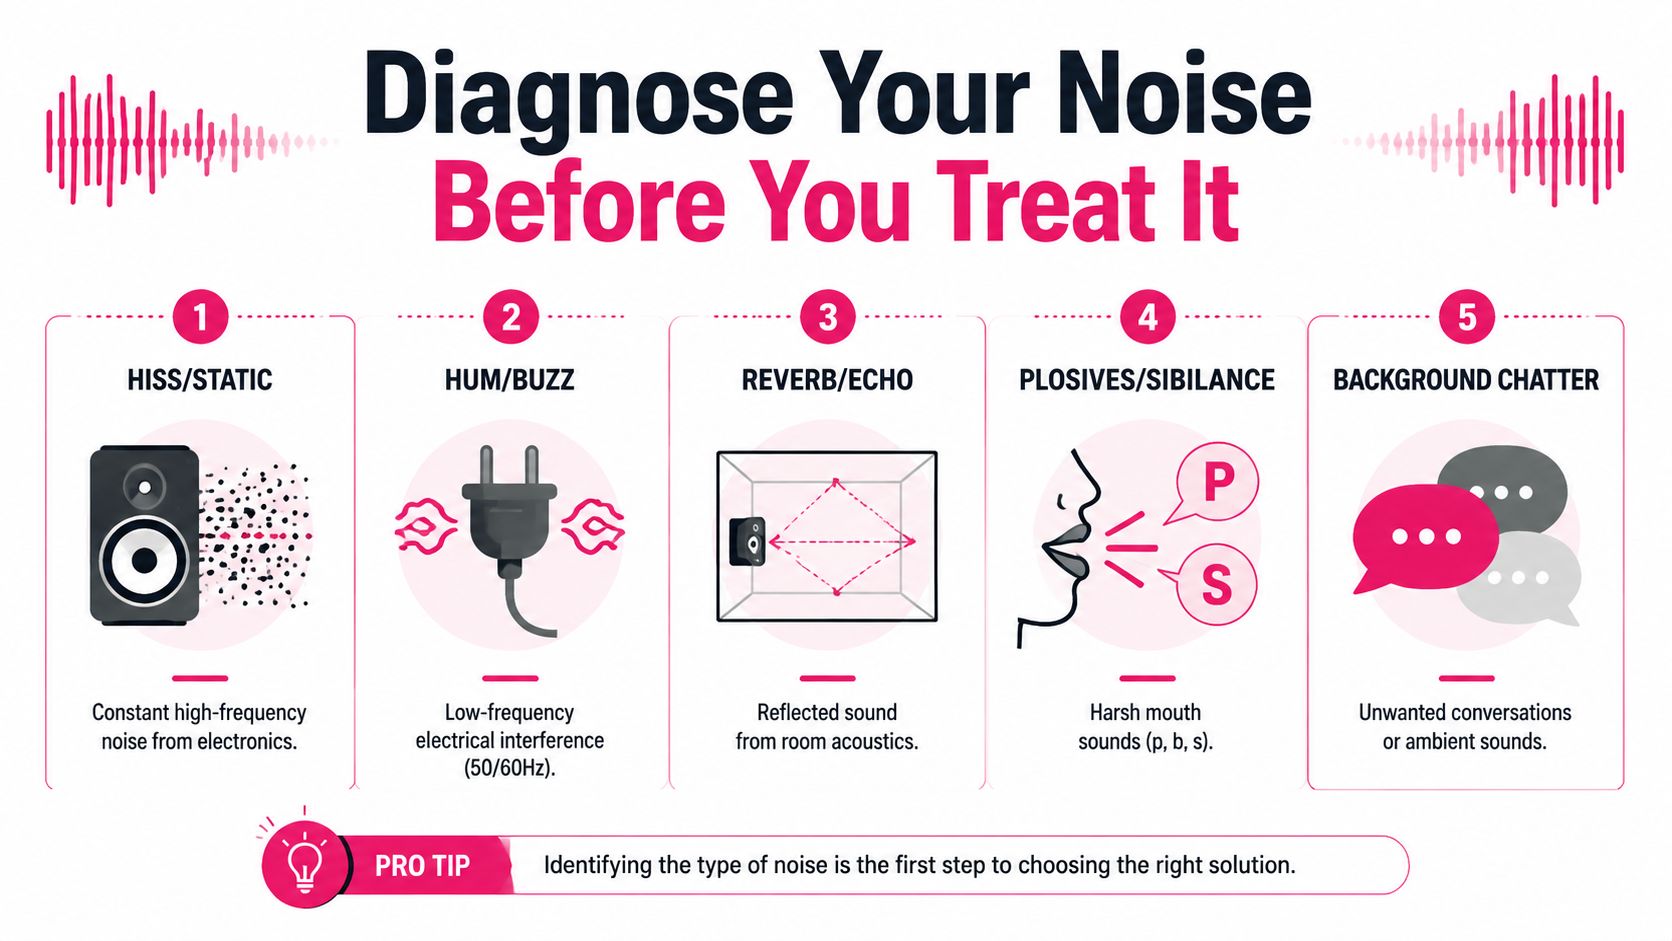
Steady noise and intermittent noise are different jobs
Start with one question. Is the noise stable, or does it jump in and out?
Steady-state noise stays relatively consistent over time. Fan hum, HVAC rumble, electrical buzz, computer noise, and hiss fall into this group. These are the sounds software handles best, because the pattern stays similar long enough to measure and reduce.
Intermittent noise appears unpredictably. Traffic pass-bys, birds, footsteps, chair squeaks, dishes, coughs, and barking dogs are the usual offenders. They are harder because they overlap speech in changing ways, and standard noise reduction does not get a clean, repeatable target.
That gap matters in real editing. Standard FFT-style denoisers are built for continuous noise, not sudden events, so they often leave transient sounds behind or smear the voice while trying to chase them. In practice, that usually means a bark or horn needs clip-by-clip repair, muting between phrases, spectral editing, or a retake if the overlap is too heavy.
This is the part many basic guides skip. Constant hiss is the easy case. Intermittent noise is where cleanup gets expensive in time and risky in sound quality.
Listen for the pattern, not just the annoyance
Don't ask only, “What is bothering me?” Ask three better questions:
- Does it run all the way through the clip or only hit certain moments?
- Does it sit under the voice, or does it collide with consonants and words?
- Will removing it globally hurt the vocal more than leaving a little of it in place?
That quick triage saves a lot of bad processing.
| Noise type | What it sounds like | Usually works | Often fails |
|---|---|---|---|
| Constant hiss | High, steady shhh | Noise print reduction, light EQ | Aggressive denoise |
| Electrical hum | Low buzz or tone | Narrow EQ cuts, hum removal | Broad full-range reduction |
| Room reverb | Washed-out voice tail | Better mic technique, selective repair | Heavy denoise alone |
| Bark, horn, slam | Sudden event | Manual edit, spectral repair | Standard denoise across whole clip |
| Mouth noise or plosives | Clicks, pops, bursts | Clip editing, dedicated tools, retakes | Global noise reduction |
One rule holds up well. If the noise moves around, one global setting rarely fixes it cleanly.
Good cleanup is often about choosing the least harmful compromise. For a YouTube video, reducing a passing truck so it stops pulling attention may be enough. For an ad, documentary interview, or branded piece where speech has to sound natural under close listening, pushing a DIY fix too far usually creates the glossy, watery artifacts clients notice right away. That is the point where careful manual repair, or a professional restoration pass, earns its keep.
The Standard Audio Cleanup Toolkit Explained
The right tool depends on what you are trying to preserve. In dialogue cleanup, that usually means protecting intelligibility first, tone second, and only then chasing a perfectly silent background. If you use one process for every problem, the voice pays for it.
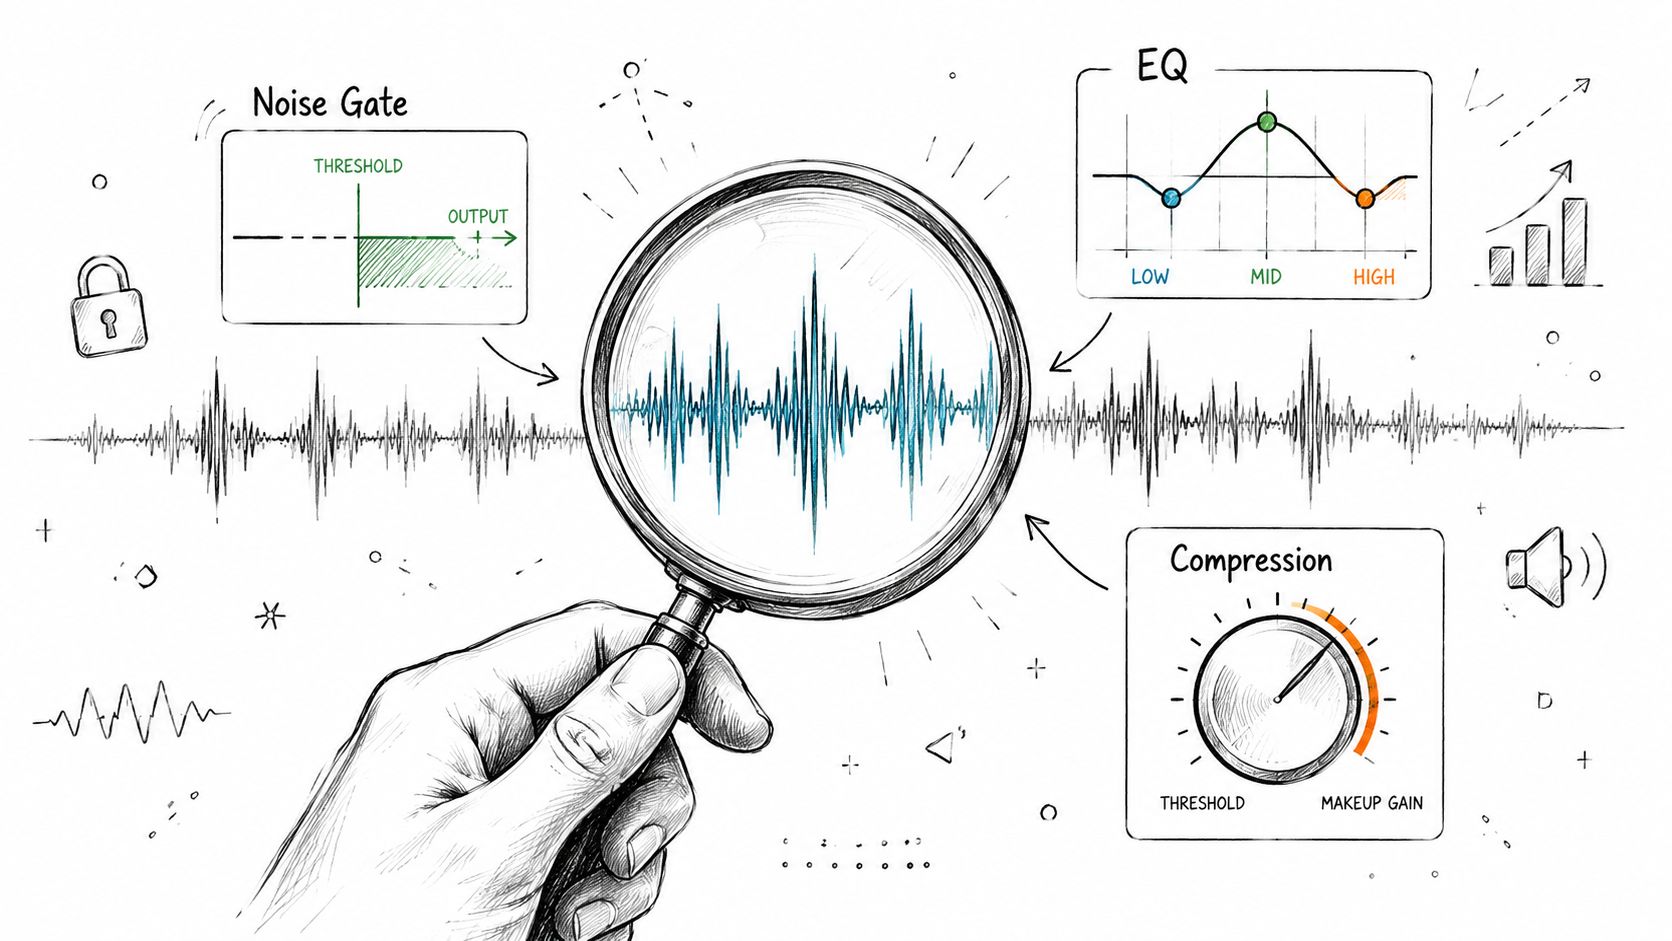
Noise print reduction
Noise print reduction samples the unwanted bed of sound, then subtracts matching content from the rest of the clip. It is still useful, but only when the noise is stable enough for the software to recognize a consistent pattern.
That makes it a good fit for steady fan noise, HVAC wash, and tape hiss. It is a poor fit for passing traffic, barking dogs, chair squeaks, or anything else that changes shape from moment to moment. On those clips, pushing noise reduction harder usually trades the original distraction for metallic, watery speech.
Audacity notes in its Noise Reduction documentation that longer noise-only selections generally produce better results than very short ones. In practice, I treat this tool as a light cleanup pass, not a rescue button.
Noise gate and expander
A gate turns down audio that falls below a threshold. An expander does the same job more gently, so the background drops instead of disappearing abruptly.
These processors are useful for pauses, breaths between lines, and dead space around spoken phrases. They do not solve noise under active speech. If the refrigerator hum or street rumble is present while the person is talking, a gate will not remove it without also clipping word endings and low-level consonants.
For spoken content, an expander often sounds safer than a hard gate. The result is less dramatic, but it avoids that chopped, amateur sound that shows up fast in voiceovers and interviews.
Surgical EQ
EQ is the first tool I reach for when the problem lives in a narrow part of the spectrum. Low rumble, electrical hum, and some harsh whistles can often be reduced with a targeted move that leaves the rest of the voice alone.
For spoken recordings, a high-pass filter can clean up unnecessary low-end buildup. Audacity's filter curve EQ guide discusses using high-pass filtering for rumble control in voice recordings, with the cutoff chosen to suit the mic and the voice rather than forcing one number on every track: Audacity filter curve EQ guidance. A thin voice after filtering is a sign you went too far.
Use EQ when the noise has a clear home. Hum may need a narrow cut at the fundamental and a few harmonics. Rumble may only need a gentle high-pass. This is often the cleanest DIY fix because you are trimming a problem area instead of processing the whole file.
If you are comparing editing environments before building a repeatable cleanup process, this guide to professional video editing software for creators and editors helps frame which apps give you stronger audio control.
Spectral repair
Spectral repair is what you use when the noise is brief, obvious, and sitting on top of otherwise usable dialogue. In spectral view, a bark, horn, phone buzz, or lip click often stands out visually enough to reduce by hand.
This takes more time than a standard denoiser. It also preserves voice quality far better when the problem is intermittent. That trade-off matters. A quick global pass is fine for a casual upload if the alternative is leaving a truck blast untouched. For branded content, interviews, ads, or documentary work, manual spectral work is often the difference between acceptable audio and processed-sounding audio.
This is also the point where DIY starts to get expensive in time. If one important take is covered by sporadic traffic, birds, and handling noise, careful restoration usually beats stacking plugins and hoping for the best.
Noise Removal Workflows in Popular Editing Software
Software matters less than judgment. The best cleanup passes are usually the ones that stop early, preserve the voice, and leave a little noise behind instead of sanding the life out of the recording.
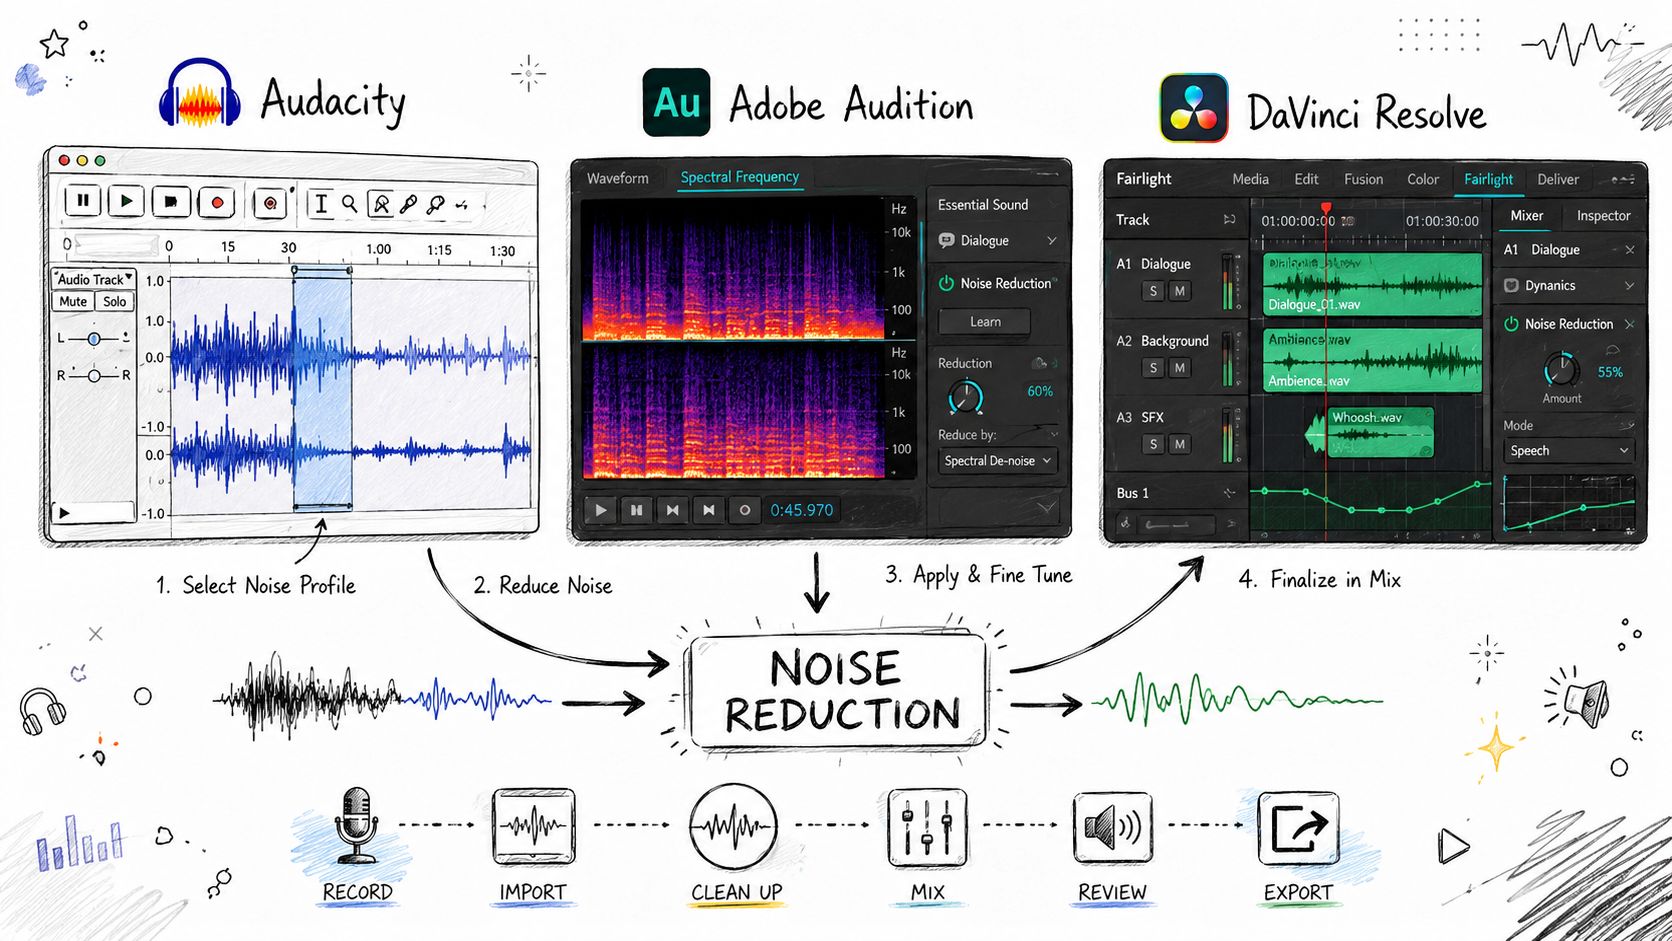
If you are still choosing an editing setup, this comparison of professional video editing software for creators and editors gives useful context on which apps offer stronger audio control inside a larger post workflow.
Constant hiss is the easy case. The harder jobs are the ones creators run into: a passing truck in one sentence, a dog bark between answers, traffic rising under a key line. Those clips punish heavy-handed global denoise. In practice, prevention still does most of the work. Software is the cleanup crew, not the rescue team.
Audacity
Audacity is still a solid free tool for learning disciplined cleanup because it forces you to be deliberate. You capture a noise profile, apply reduction, preview, and back off when the voice starts thinning out.
As described in this Audacity walkthrough, a common starting workflow is to select 2 to 5 seconds of pure background noise, then go to Effects > Noise Reduction and click Get Noise Profile. The same walkthrough recommends starting around 12 dB of reduction with Sensitivity 6 after selecting the full track and reopening the effect.
Those settings are only a starting point. On one recording they can be fine. On another, they can produce the underwater edge that gives amateur cleanup away in seconds.
A few Audacity habits improve results:
- Reduce in modest steps: One restrained pass usually sounds better than a hard pass that tries to solve everything.
- Check the removed material: If residue monitoring reveals parts of the voice, the denoiser is biting too hard.
- Clean the low end first when needed: Rumble can confuse noise reduction and make it work harder than necessary.
Audacity is good enough for steady fan noise, computer hum, and casual spoken content. It is much less forgiving with intermittent sounds. If the problem is a bark or horn over a word, manual repair in a dedicated restoration tool is usually safer than forcing more reduction.
Adobe Audition and Premiere Pro
Adobe's advantage is speed. Editors already cutting in Premiere can do a quick pass without leaving the timeline, and Audition gives more detailed control when the job needs it.
For simple background wash, start lightly on a duplicated clip or alternate track so the original stays intact. Then listen to consonants, breaths, and room tone between phrases. Those details tell you faster than any meter when the tool has crossed from cleanup into damage.
Premiere works well for fast editorial polish. Audition is the better choice when noise changes across clips or lives in specific frequency areas. That difference matters on interviews, branded content, and client work where the voice has to stay natural across cuts.
A voice can carry a little noise. It rarely carries aggressive processing well.
DaVinci Resolve
Resolve on the Fairlight page gives creators a practical middle ground. It keeps audio cleanup inside the video edit, which is efficient when the job is straightforward and the deadline is real.
Use it clip by clip, not as a blanket fix across the whole timeline. Pull out obvious rumble first. Apply noise reduction conservatively. If only certain phrases are bad, automate or adjust those sections instead of treating every line the same way.
That last part is where many DIY cleanups go wrong. One preset over an entire interview often over-processes the good lines and still misses the worst interruptions.
A short demonstration is useful before you start tweaking your own files:
A good processing order
Order changes the result because each processor reacts to what the previous one leaves behind.
For spoken-word audio, this sequence is usually reliable:
| Step | Purpose | Why it comes here |
|---|---|---|
| High-pass filter | Remove low rumble | Keeps low junk from triggering later processors |
| Noise print or denoise | Reduce steady noise | Works better before final tonal shaping |
| EQ refinement | Clean problem bands | Lets you trim what remains selectively |
| Gate or expander | Tidy pauses | Safer after the overall noise floor is lower |
| Leveling and compression | Final polish | Prevents early gain moves from raising noise |
Treat that as a baseline, not a rulebook. Intermittent noise often needs manual attention before any standard chain helps. Reverberant audio is another limit case. Once a bad room is baked into the recording, no plugin stack fully restores the clarity you would have had from better mic placement, better isolation, or a proper restoration pass.
Advanced Techniques and When to Hire a Professional
A voice track with steady hiss is usually manageable. A voice track with hiss, traffic bursts, chair squeaks, clipped words, and room echo is a restoration job.
When standard tools stop being enough
This is the point where broad cleanup stops being efficient. A normal DAW noise reducer can lower a constant bed of hum or fan noise, but it struggles when the distractions keep changing. Dogs bark. Trucks pass. A lav rustles for half a sentence, then disappears. Those problems need clip-by-clip decisions, spectral repair, and restraint.
For tougher work, many editors move to iZotope RX. In iZotope's guide to cleaning up noisy audio, the recommended workflow uses Vocal De-noise, then Spectral De-noise, then Spectral Recovery. That same guide says steady-state noise such as HVAC hum can be reduced by 18–25 dB with minimal artifacts and describes that result as a significant improvement over the 70% success rate of standard DAW plugins in industry tests.
A key advantage is control. Advanced tools let you treat a refrigerator hum differently from a horn blast or a mouth click. They also let you repair only the damaged moment instead of dragging the whole file through aggressive processing that thins the voice.
That matters because prevention still does most of the heavy lifting. If the original recording has bad mic placement, hard room reflections, and intermittent street noise baked in, software can only trade one problem for another. Cleaner but phasey is still bad audio.
When handing it off is the smart move
Professional cleanup makes sense in a few common situations:
- The recording cannot be replaced: Interviews, live events, testimonials, documentary footage.
- The voice has to sound credible: Courses, branded videos, webinars, paid reads.
- The project has a lot of footage: Manual repair across dozens of clips takes real time.
- Your fixes keep hurting the voice: If each pass removes noise but also removes presence, stop.
I tell creators to be honest about the stakes. For a YouTube video with a little background wash, a decent DIY cleanup is often good enough. For client work, ads, investor content, or anything where poor audio makes the brand sound careless, good enough gets expensive fast.
If you need that level of help, it usually makes more sense to hire a video editor for audio cleanup and post-production than spend hours forcing a damaged recording through presets. A professional pass will not perform miracles, but it can preserve more of the original voice, avoid obvious artifacts, and save material that a basic plugin chain would flatten or smear.
If you want polished videos without getting stuck in denoise settings, EQ cuts, and repair passes, Your Video Editor can handle the cleanup and the full edit workflow for you. That is especially useful when the audio matters as much as the visuals and you need the result to sound intentional, not merely less noisy.