You've probably already lived through the bad version of filming on a green screen. The screen looked smooth enough to the eye. The subject seemed separated from the background. Then the edit came back with crunchy hair, a green halo on the jawline, and edges that screamed “cheap effect” before the audience heard a word of your message.
That usually isn't a post-production failure. It's a shooting failure.
A good green screen shoot doesn't start with the keying tool. It starts with decisions that make life easier for the editor who has to pull the key, clean the edges, match the background, and deliver something that looks intentional. Green screen technology gives creators enormous freedom. It allows actors to appear in almost any environment, from virtual cities to alien worlds, supports real-time compositing on set, and gives productions more control and consistency across everything from training videos to virtual production, as explained in Mammoth's overview of green screen benefits.
Table of Contents
- Beyond the Basics of Chroma Key
- Pre-Production for Your Green Screen Setup
- Lighting and Camera Settings for a Perfect Key
- On-Set Execution and Performance
- Troubleshooting Common Green Screen Problems
- From Shoot to Edit Handing Off Footage for Keying
Beyond the Basics of Chroma Key
The classic beginner mistake is simple. Someone hangs a green cloth, throws a couple of lights at it, stands the presenter too close, and assumes software will sort it out later. Software won't. It will reveal every shortcut you took on set.
That's why serious creators need to think beyond chroma key as a button. Filming on a green screen is a pipeline, not a trick. The screen has to be clean. The lighting has to be controlled. The camera settings have to stay stable. The performance has to respect an imaginary environment. And the footage has to arrive in post with enough information for someone else to finish the work.
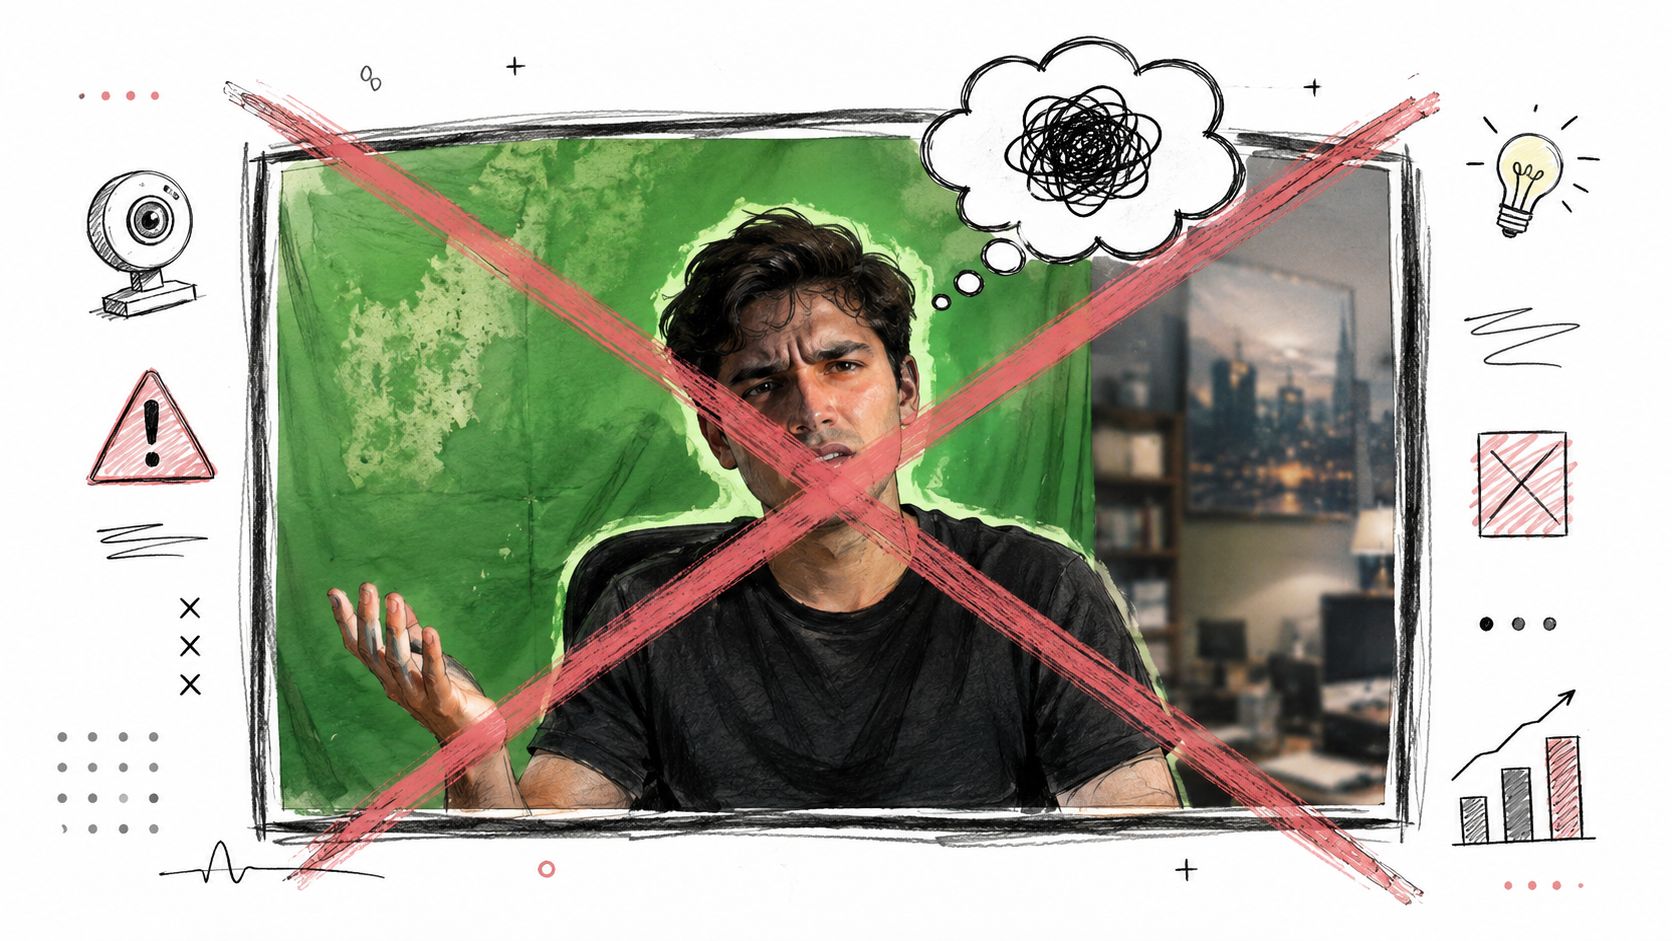
The difference between amateur and professional results usually shows up around the edges. Hair tells the truth. Transparent fabrics tell the truth. Fast hand movements tell the truth. If the shoot wasn't disciplined, the key will break exactly where the eye goes first.
Practical rule: If the editor has to rescue the shot, the shot was already too expensive.
Done properly, green screen opens up production in a way physical locations often can't. You can place talent in a corporate set, a product demo environment, a stylized abstract space, or a full virtual world without dragging a crew across town. That freedom is why creators use it for ads, education, corporate content, tutorials, and higher-end virtual production. The point isn't novelty. The point is control.
Pre-Production for Your Green Screen Setup
Most green screen problems are decided before the camera comes out. If the material wrinkles, if the room is too cramped, or if shiny objects are bouncing green back into the set, you're fighting the space before you've recorded a frame.
Choose the screen that fits your job
There isn't one best green screen. There's only the right one for the type of work you're doing.
| Option | Best for | Trade-off |
|---|---|---|
| Fabric panel | Portable creator setups, small rooms, quick interviews | Easy to wrinkle, needs tension |
| Paper roll | Cleaner studio look, repeatable setup | Tears, creases, ongoing replacement |
| Painted wall | Frequent shoots in a fixed studio | Permanent commitment, room must support it |
Good is a collapsible or stretched fabric screen when you need mobility. It works if you can pull it tight and keep it flat. Loose fabric is where beginners lose hours in post.
Better is continuous paper if your setup is mostly fixed and you want a smooth surface with fewer texture issues. Paper behaves well on camera, but once it gets damaged, dirty, or kinked, it loses its uniform quality.
Best is a properly prepared painted wall when you're shooting green screen content often enough to justify permanence. It removes setup variability. That matters because consistency is what gives an editor predictable footage.
A green screen doesn't need to be fancy. It needs to be flat, matte, and controllable.
Build the room around the shot
The room matters as much as the backdrop. A cramped room forces compromises. You end up pressing the subject too close to the screen, cramming lights into bad angles, and accepting reflections from whatever else is in the space.
Set the room with the final frame in mind:
- Clear reflective clutter: Glass, chrome, glossy furniture, and bright white surfaces can bounce contamination back into the shot.
- Give the camera clean sight lines: Don't let stands, sandbags, or room junk push you into a lens choice you didn't want.
- Plan for the final delivery format: If you're producing for multiple platforms, frame with post-cropping in mind. This matters when the same footage may need horizontal and vertical versions. A practical reference is this guide to video aspect ratios across platforms.
- Stretch and secure every edge: Seams, droops, and small folds often look minor on set and become major once the key isolates tonal variation.
A screen surface should feel boring. That's the goal. No texture. No shine. No visible tension points. Nothing that creates localized dark or bright areas.
Build for the editor, not just the shoot day
A creator on set usually judges the image by the monitor. An editor judges it by how cleanly it separates. Those are not the same thing.
Think like the person inheriting your footage. They need uniform color, clean subject separation, and consistency from take to take. A backdrop that changes shape during the session can turn matching shots into separate problems. That's why pros lock the physical setup before they start refining performance.
Lighting and Camera Settings for a Perfect Key
A creator wraps a shoot, the footage looks fine on the monitor, then the editor opens it and finds uneven green, drifting white balance, and soft color edges around hair. That is the definitive standard for green screen. The test is not whether it looked acceptable on set. The test is whether someone else can key it fast, cleanly, and consistently.
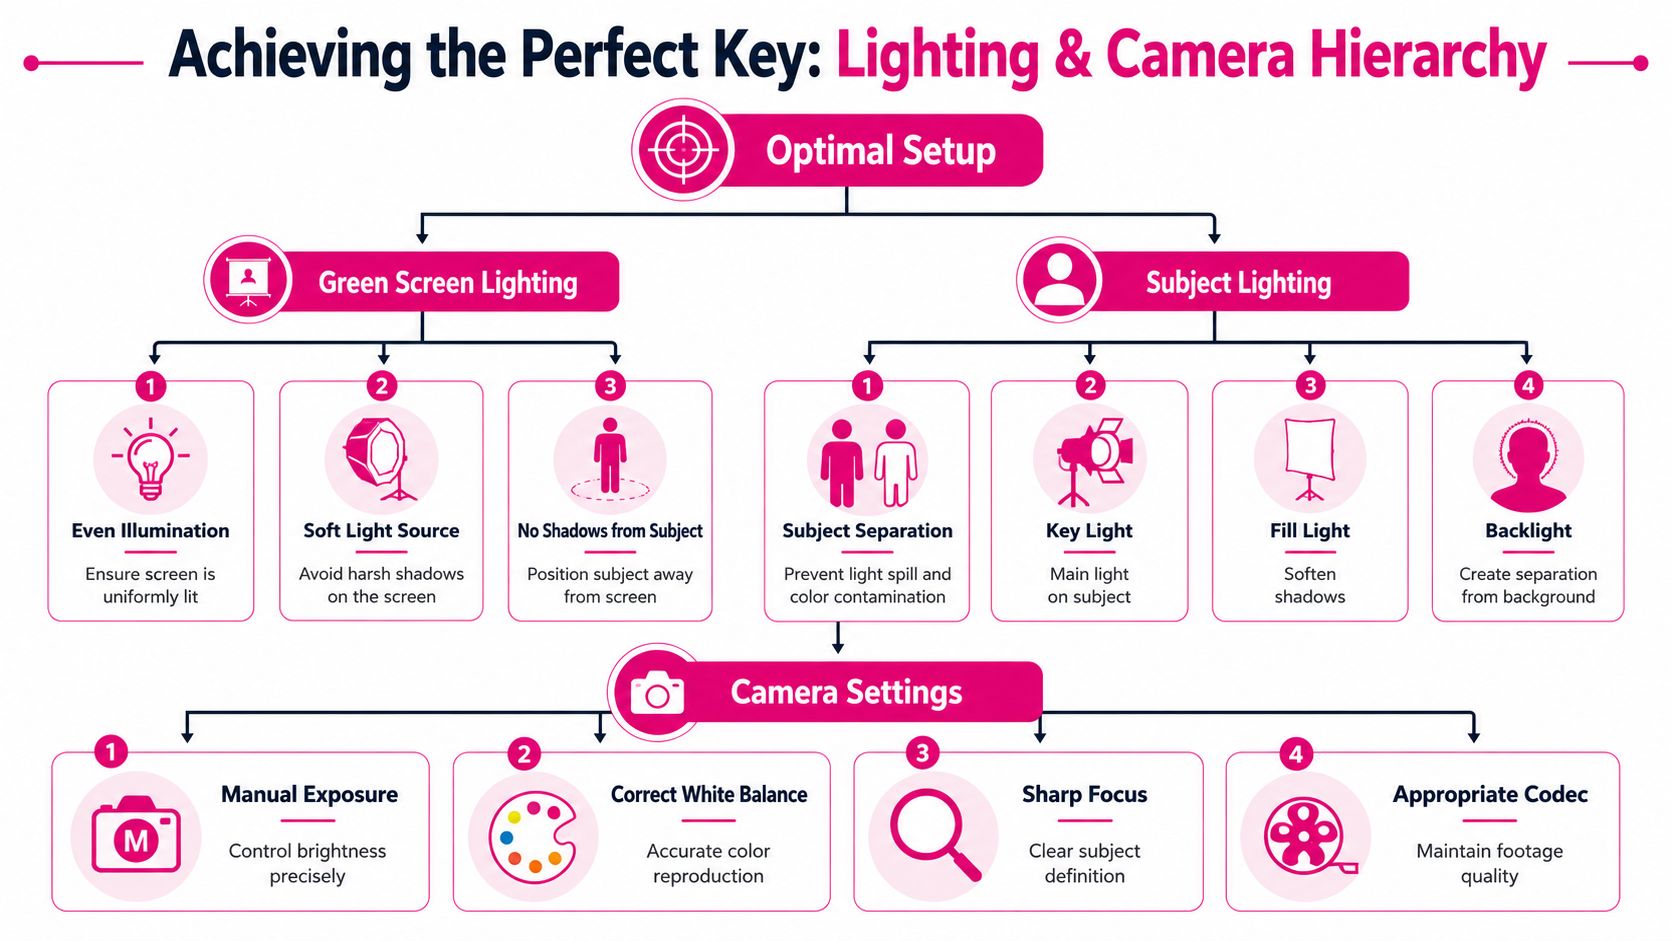
Light the background and subject as separate jobs
Screen light and subject light serve different purposes. The screen needs even exposure. The subject needs shape, contrast, and edge separation. Mix those jobs together and post pays for it with chatter, spill, and ugly mattes.
A solid working setup uses dedicated lights for the screen, dedicated lights for the subject, and a backlight or edge light to help define the outline. Keep the green background even on the waveform, avoid bright hotspots, and give the talent enough distance from the backdrop to reduce spill. Manual white balance and 4:2:2 capture also improve the hand-off because they preserve more stable color and cleaner edges for compositing, as noted in West London Studio's green screen technical guide.
The reason is simple. Keyers do not isolate “green” in some vague sense. They isolate a specific color and luminance range. If the screen swings brighter on one side, or shifts in hue from take to take, the matte becomes a negotiation instead of a clean pull.
Use this as the lighting priority:
| Area | What you want | What goes wrong when you miss it |
|---|---|---|
| Green screen | Even illumination | Hotspots, patchy keys, noisy edges |
| Subject | Controlled modeling | Flat face, spill, poor separation |
| Back edge | Gentle separation | Outline gets lost in the composite |
A practical demo helps if you want to see the setup logic in action.
Lock the camera before you roll
Auto settings create inconsistency, and inconsistency is what slows down keying.
Auto exposure shifts the screen level between takes. Auto white balance changes the green itself. Autofocus breathes at the hairline or shoulder edge and gives the compositor a moving problem to solve. Manual control is the safer choice because it keeps every take in the same technical neighborhood.
Record the strongest file your camera can produce without compromising reliability on set. If that means external recording for a better codec or chroma sampling, use it on a dedicated green screen day. If the camera tops out at a thinner recording format, simplify the shot, protect exposure, and avoid anything that makes the matte harder, especially flyaway hair, fast motion, and transparent props.
This is also where production sound intersects with post efficiency. If the editor has to repair dialogue and key difficult footage at the same time, the job slows down fast. Clean audio will not improve the matte, but it does make the overall post package easier to process. It helps to reduce background noise before editing rather than handing off two technical problems in the same clip.
Set the image for the composite, not for the room
Many creators light the subject to look good standing in front of a green wall. That is the wrong target. Light for the background plate or scene the subject will live in later.
If the final composite is a soft window-lit office, hard top light on set will never feel believable. If the replacement background has strong directional sunset light, flat frontal lighting on the talent will look pasted in no matter how good the key is.
That is the trade-off. The cleaner, flatter setup may make keying easier, but the more the subject lighting ignores the final environment, the more fake the result looks. Good green screen work balances both. Clean extraction first, then lighting logic that matches the destination shot.
Use this on-set check before every take
Before recording, run this check:
- Check the waveform. The screen should read evenly without obvious hot or dark patches.
- Check separation. Hair, shoulders, and hands usually show spill first.
- Check subject distance. More space between talent and screen reduces contamination and gives the editor cleaner edges.
- Check white balance and exposure lock. Any auto setting left on can shift the key between takes.
- Check recording format. Confirm the planned codec, bit depth, and chroma settings are active.
- Check for a hand-off mindset. Ask whether an external editor could match this take to the previous one without extra cleanup.
That last point matters more than creators expect. A green screen shoot succeeds when the footage holds up after it leaves the set.
On-Set Execution and Performance
The setup looks solid. Then talent steps onto the mark in a green-gray jacket, the host wears a polished watch that picks up green spill, and the camera operator adds a small push-in without anyone planning a matching clean plate. The key may still pull, but post now has edge contamination, reflection cleanup, and missing background information to rebuild by hand.
That is the part many creators miss. A green screen shoot is not finished when the screen keys. It is finished when an editor or compositor can take the footage, understand the intent, and deliver a believable composite without guessing what happened on set.
Wardrobe and eyelines shape the composite before post starts
Choose wardrobe for separation, texture control, and the final composite. “Close to green” is still a problem, especially in compression-heavy formats where subtle color differences fall apart fast. Reflective surfaces are just as risky. Watches, sequins, glossy makeup, and metallic fabrics catch green bounce and create highlights that do not key cleanly.
A simple wardrobe filter works well on set:
- No green or yellow-green tones: Small color contamination becomes a larger post problem at the edge.
- Avoid shiny surfaces: Reflections carry the screen color into places the keyer should be protecting.
- Limit fine patterns: Tight stripes, herringbone, and micro-checks can break apart during keying and resizing.
- Dress for the destination scene: A subject meant to live in a corporate office, studio set, or outdoor plate should not look disconnected from that world.
Eyelines matter just as much. If the subject is speaking to an off-camera person, reading a virtual monitor, or reacting to something that will be added later, mark it with intention. Tape an eyeline mark. Put a stand-in near the lens. Give the talent a fixed reference with height and distance that match the final shot. Editors can repair a rough matte more easily than a performance that looks like it is aimed at empty space.
Clean plates are what save moving shots
To achieve a professional hand-off, if the camera moves, or the talent crosses areas that need cleanup, shoot a clean plate of the exact same shot without the subject. That plate gives the compositor real image data for patching edges, replacing tracking markers, removing stands, and rebuilding areas the raw key cannot recover.
The point is well established in practice, and beginner tutorials often skip it. InFocus Film School's article on filming with green screen specifically calls out the value of clean plates for post work.
I treat clean plates as part of the take package, not an optional extra. If you outsource editing to a team or service such as Your Video Editor, that habit saves time immediately because the editor is not forced to invent coverage you could have captured in ten seconds.
For a usable clean plate, match everything:
- Same camera position or same programmed move
- Same lens and focal length
- Same focus distance
- Same lighting levels
- Same frame size and timing
If any of those change, the plate stops being a direct repair tool. It becomes reference footage.
Performance continuity matters too. Have talent hold their end mark for a beat before resetting. That gives post cleaner frames for motion blur analysis, roto assists, and transition points. If the shot includes dialogue, keep the audio organized with the same discipline. Label takes clearly, slate wild lines, and control room noise early. A practical guide to removing background noise from video audio helps when dialogue cleanup is part of the same delivery.
Good on-set execution protects the composite twice. It gives you a cleaner key, and it gives the editor enough matching material to finish the shot without rescue work.
Troubleshooting Common Green Screen Problems
Bad green screen footage isn't always dead footage. Most failures announce themselves early if you know where to look. The mistake is treating every artifact like a software issue. Usually, the edge tells you what went wrong on set.
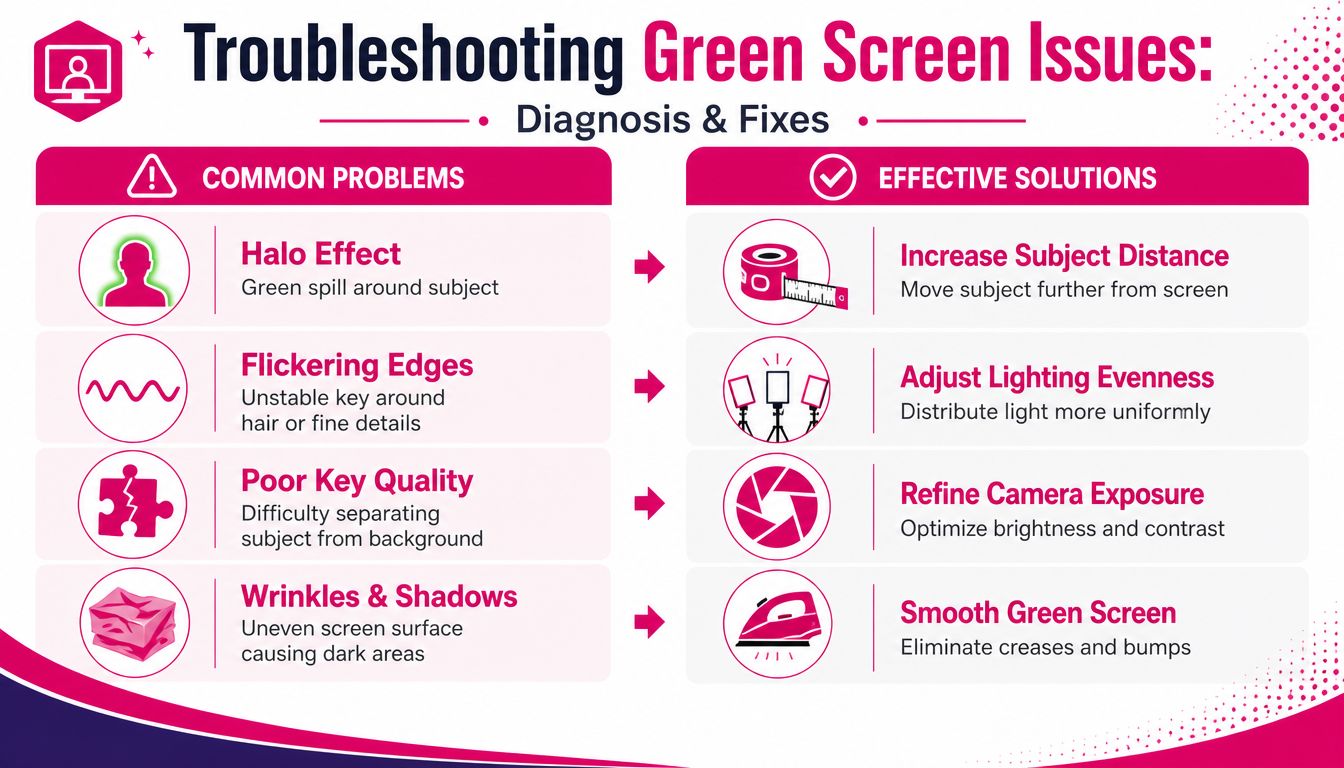
Fix spill before you fight it in post
A green halo around cheeks, ears, or shoulders isn't mysterious. It usually means the subject is catching bounced green light from the background or the backlight strategy is weak.
Common causes and fixes:
- Subject too close to the screen: Move them farther away if the room allows.
- Screen lights bleeding forward: Flag or redirect them so they stay on the backdrop.
- Back edge too soft: Use separation light more intentionally so the subject reads distinctly.
- Reflective wardrobe or skin shine: Powder, fabric changes, and surface control help more than plugin cleanup later.
A little spill can be managed. Heavy spill usually forces aggressive edge correction, and that starts eating into hair detail and natural skin edges.
Read the problem from the edge quality
If the key flickers around hair or fingers, don't start by blaming the software. Ask what kind of information you gave it.
Use this field guide:
| Symptom | Likely cause | Best first response |
|---|---|---|
| Halo effect | Spill contamination | Increase separation and control bounce |
| Patchy key on background | Uneven lighting | Rebalance screen illumination |
| Crunchy hair edges | Weak color data or blur | Improve capture quality and sharpness |
| Dark bands or blotches | Wrinkles or shadows | Smooth the screen and relight |
Small defects don't ruin the shot. Misdiagnosis ruins the shot.
Wrinkles are a good example. Creators often panic because they see a crease and assume the whole take is unusable. Usually, it isn't. What matters is whether the crease creates a tonal shift inside the framed action area. If it does, fix the fabric. If it sits safely outside the shot, keep moving.
The same goes for shadows. A shadow isn't just “more darkness.” It creates a second green value, sometimes several, and the keyer has to decide what counts as background versus contamination. That uncertainty is what creates unstable composites.
When troubleshooting, stay disciplined. Change one variable at a time. Move the subject. Adjust the screen lights. Refine the subject light. Check the monitor again. Random tweaking wastes time because you never learn which change solved the problem.
From Shoot to Edit Handing Off Footage for Keying
A green screen shoot doesn't end when the camera cuts. It ends when the editor receives a package they can trust.
A lot of otherwise capable creators often sabotage their own results. They shoot carefully, then deliver files named “final_take_new,” forget the clean plate, omit the selected takes, and leave the editor guessing which background was intended. That guesswork costs time, invites revisions, and pushes creative energy into detective work.
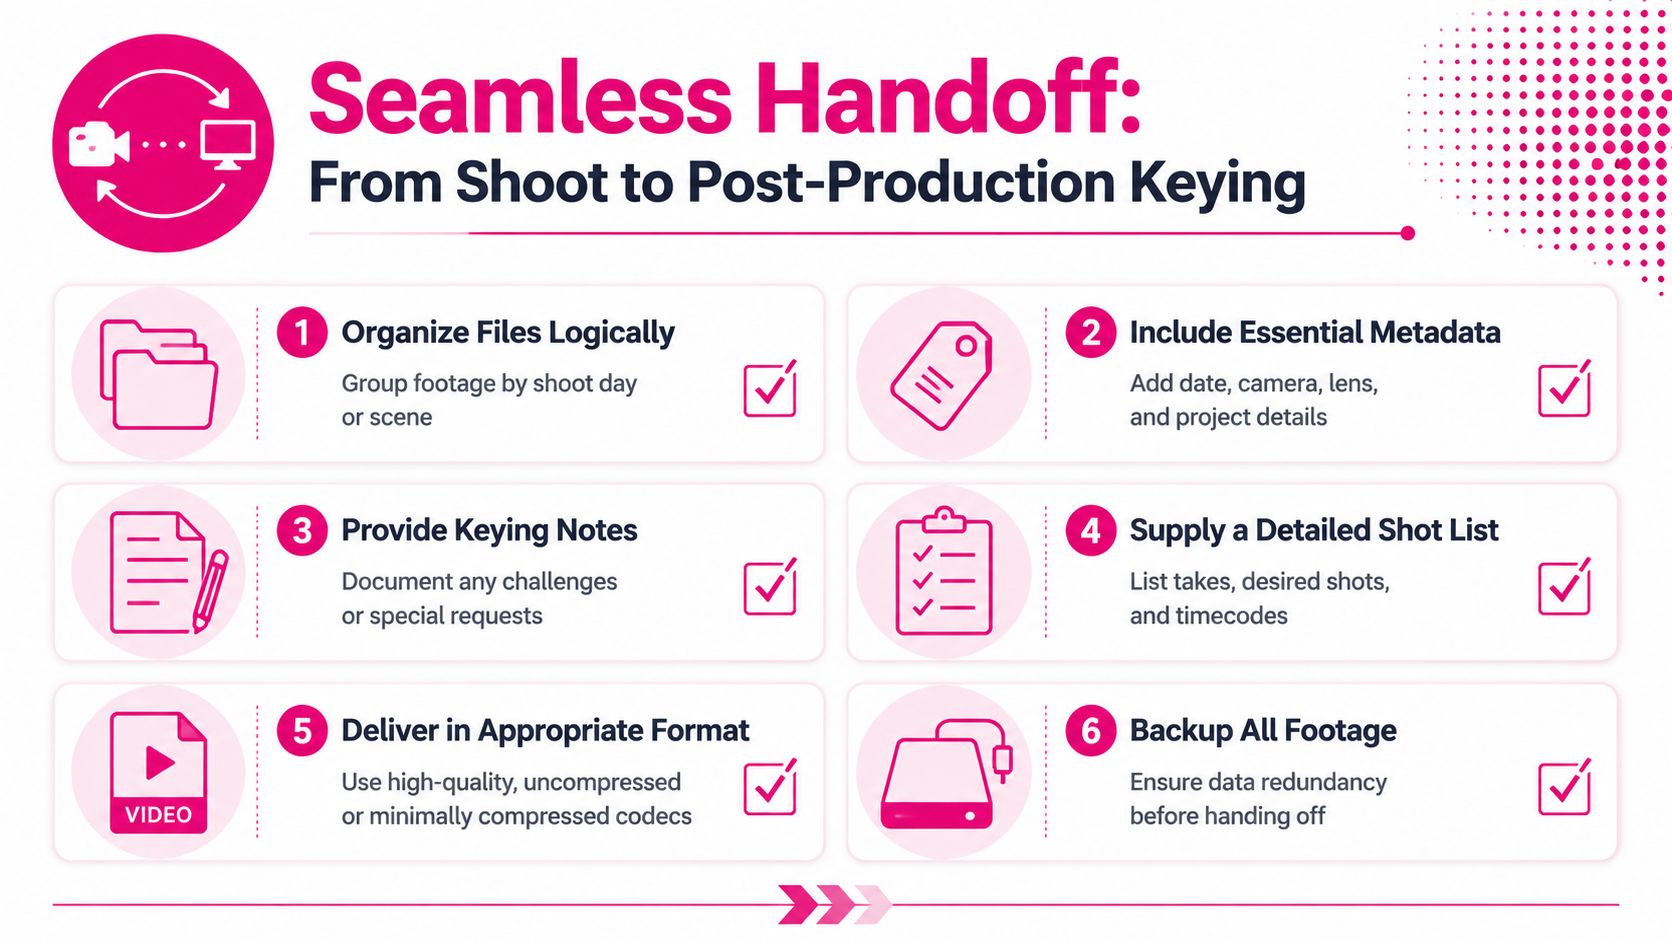
What your editor actually needs
Deliverables should be boring, complete, and obvious.
Send:
- Primary camera footage: All selects and any alternate takes worth considering.
- Clean plates: Especially for any shot with camera movement or tracking markers.
- Audio files: External recorder files, lav tracks, boom tracks, and sync notes.
- Background references: Stills, mockups, or links that show the intended final environment.
- Shot notes: Which take is preferred, where performance beats happen, and any problem areas you already noticed.
If you're collaborating across different post workflows, it also helps to know how the editing environment may shape the finishing process. This comparison of Final Cut Pro versus Adobe Premiere Pro gives a useful overview of how teams may approach projects differently.
A handoff checklist that prevents revision loops
Use a simple packaging pass before upload:
Rename files clearly
Scene, shot, take, and camera identifiers should make sense without explanation.Separate raw footage from support assets
Don't bury clean plates inside random folders or mix them with exports.Include a short readme
One page is enough. State preferred takes, intended background style, frame rate, and any concerns.Flag anything unusual
If a take has minor spill, a screen wrinkle at frame edge, or a tracking issue, say so. Editors work faster when they know what they're inheriting.Back up before transfer
Never make the upload copy your only copy.
A clean handoff saves money because the editor spends time comping and polishing instead of searching, syncing, and decoding your intent. It also improves the creative result. When the post team has everything they need, they can focus on believability, edge work, color integration, and the final illusion. That's the part the audience sees.
If you're filming on a green screen and want the post side handled with the same level of discipline, Your Video Editor is built for that kind of workflow. Their team handles editing, compositing, audio cleanup, motion graphics, and review cycles through a structured client portal with timestamped feedback, which makes green screen projects easier to organize and finish without chaos.